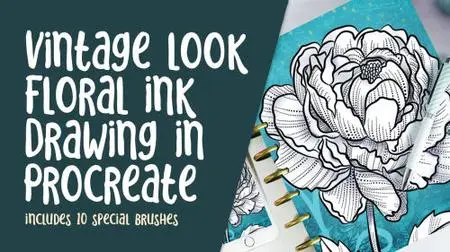
Vintage Look Floral Ink Drawing in Procreate With 10 Brushes Included
Duration: 45m | .MP4 1280x720, 30 fps(r) | AAC, 48000 Hz, 2ch | 571 MB
Genre: eLearning | Language: English
Duration: 45m | .MP4 1280x720, 30 fps(r) | AAC, 48000 Hz, 2ch | 571 MB
Genre: eLearning | Language: English
I have long been a fan of ink drawings and I was taught all the techniques by a master: my high school Commercial Art teacher. He, in turn, was taught by masters as well in England. He emigrated to Canada, and I was fortunate enough to have his tutelage. We used ruling pens, croquil pens and Rapidographs, or technical pens. One of my favorite subjects to draw was flowers, so I have been doing them in this way for over 40 years. He also taught us how to do wash drawings, which is a technique similar to watercolor, but done with watered down black ink. This class, Vintage Look Floral Ink Drawing in Procreate, will show you some of my inking and wash methodology, and ways to use brushes to add dimension. In the class, I take you from start to finish in creating a complete floral illustration, notably with mixed media background. And, I have created a brush set, Inky Business, to complement the class. I am giving you a sampler set with this class so that you can see the possibilities with the full set which is available in the artist resources.
In this class I’ll walk you through:
my step-by-step method for tracing a royalty free image
my workflow for adding dimension
adjusting the brushes included to create different effects
using a wash technique for additional shading
ideas for creating a background
If you’ve always admired the look of vintage inking illustrations, you will enjoy this class and the advantage of working on this digitally. The full brush set gives you tons of options, like cross-hatching and various inkers which mimic particular ink looks. Do a bunch of research first to see what might inspire you.
The key concepts I will include:
review of my brush alterations and adjustments
a look at Procreate inking brushes and their various idiosyncrasies
approaches you can take in adding dimensionality to ink drawings
Learning new Procreate workflows is always an advantage. I know you can produce something really appealing, and it’s so interesting to work just in black and white. Practice makes perfect, so I would suggest you do more than one of these, and then use it on a mock-up to really see the impact!
Intro to Vintage Look Floral Ink Drawing in Procreate
This short intro will give you an overview of the class.
Lesson 1: Overview and Document Set Up
In this lesson, I will give an overview of vintage illustration techniques and explain why illustrations were done in this way. We will start the contour drawing in this lesson by tracing a photograph and I speak to using your own photos or royalty free images.
Lesson 2: Adding the Details and More
In this lesson, I show you several of the brushes from the resources package and explain the idiosyncrasies of each. I show you methods to make the use of these brushes easier. We start to add some of the stippled lines here and I explain how to work with this brush to help show shadow areas. The brush is pressure sensitive as well, so that helps to vary the lines with the use of only the one brush.
Lesson 3: Filling in the Stippled Shading Lines
In this lesson, I will explain how to add all the rest of the detail lines. I explain controls on the brushes to help vary the thickness. I also demonstrate how to create areas of shadow and highlights. Creating variety within the illustration is desirable.
Lesson 4: Adding a Wash Layer
Creating even more contrast using a black and white wash is the focus of this lesson. I show you how to use the brush I have included in your set to build up the shadow areas. I show you how to layer the wash and how to correct any issues that may arise. I have included two suitable brushes for you in the provided set.
Lesson 5: Finishing Touches and Background Ideas
In this lesson, we will be finalizing the illustration and that will include creating a background using a bunch of mixed media brushes. I have included a few and I encourage you to consider and experiment with different ideas. Even a solid color looks great behind the flower, and I show you how to maintain the white within the flower.
Lesson 6: Conclusion, Mockup and Next Steps
We will conclude everything in this lesson. I show you a couple of quick mock-ups with the art and we end with a chat about next steps.
Concepts covered:
Concepts covered include but are not limited to Procreate floral design, Procreate texture with brushes, Procreate brush settings, flower drawing specific issues, tracing a photo for a contour drawing, the Brush Studio in Procreate, adjusting Procreate brushes, pressure settings and how to use them to create highlights and shadows, adding wash shading with brushes, procreate brushes for adding other interesting details, workflow best practices, layering best practices, Procreate composites, techniques with paints and blending, and much more.
You will get the bonus of…
45 minutes of direction from an instructor who has been in graphic design business and education for over 40 years
knowledge of multiple ways to solve each design challenge
an outline with links to further research
a list of helpful online sites to further your education into surface pattern design


