

Raspberry Pi Full Stack Upgrade Project
Raspberry Pi Full Stack Upgrade Project
Published 11/2022
MP4 | Video: h264, 1280x720 | Audio: AAC, 44.1 KHz
Language: English | Size: 5.64 GB | Duration: 7h 39m
Published 11/2022
MP4 | Video: h264, 1280x720 | Audio: AAC, 44.1 KHz
Language: English | Size: 5.64 GB | Duration: 7h 39m
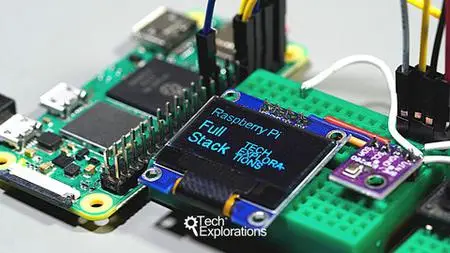
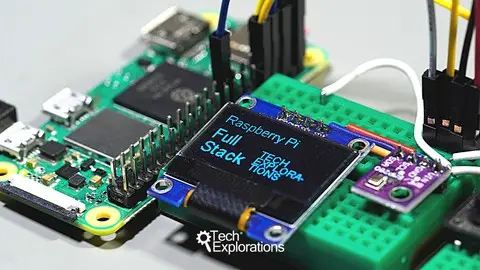
A challenging upgrade project that blends Raspberry Pi, ESP32, sensors, displays, radio communications & Cloud services.
What you'll learn
Become better at the analysis, design, and planning required when working on large projects.
Improve your ability to build a full-stack application based on the Raspberry Pi, the ESP32 and a combination of software tools and technologies.
You will gain new skills in maintaining, modifying, and extending a full-stack application.
Improve your understanding of the the Linux operating system and the command line.
Learn how to use the HC12 transceiver to allow communications between a Raspberry Pi and ESP32 (or any Arduino compatible) boards.
Show Raspberry Pi status information on an OLED screen.
Get environment data from a BME280 sensor on a Raspberry Pi and ESP32.
Use Google Charts and Plotly Graph Object in a Raspberry Pi web application.
Requirements
I recommend that you Raspberry Pi Full Stack before attempting Raspberry Pi Full Stack Upgrade Project.
Be comfortable with Linux and the command line.
Be comfortable with wiring simple circuits.
Any prior experience with the Raspberry Pi, ESP32, or the Arduino is a plus.
Description
Welcome to Raspberry Pi Full Stack Upgrade Project!In the original Raspberry Pi Full Stack course, you learned how to build an application that integrates microcomputers, microcontrollers, sensors, radio transceivers, web servers, a database, and Cloud services.This course will teach you how to upgrade this application with new hardware and software.The upgraded Full Stack application utilises the Raspberry Pi Zero 2 W single-board computer and the ESP32 microcontroller - although you can use any Raspberry Pi and Arduino-compatible board. The two nodes communicate via a modern radio transceiver. They can sense their environment, show their status on an organic LED display and a web interface, log data on the Cloud, and trigger notifications when specific conditions arise. By completing this course, you will gain and improve soft and hard knowledge and skills. You will become better at the analysis, design, and planning required when working on large projects. And you will learn how to integrate sensors, displays, and local and Cloud communications using Raspberry Pi and ESP32 or Arduino boards.This course will stretch your skills. I designed it for intermediate-level Makers that, ideally, have completed the original Raspberry Pi Full Stack course. Please review the free lectures in the first section to find out more details about the course.I'm looking forward to seeing you on the course.
Overview
Section 1: 01 - Introduction
Lecture 1 01.10 - What is this course about
Lecture 2 01.20 - Parts you will need
Lecture 3 01.30 - Code repository
Lecture 4 01.40 - Application demonstration
Section 2: 02 - The new boards
Lecture 5 02.10 - Raspberry Pi Zero 2 W review
Lecture 6 02.20 - Raspberry Pi OS installation
Lecture 7 02.30 - Raspberry Pi OS preparation
Lecture 8 02.40 - ESP32 review
Lecture 9 02.50 - ESP32 and Arduino IDE
Section 3: 03 - Replace the DHT22 with the BME280
Lecture 10 03.05 - BME280 basics and why replace the DHT22
Lecture 11 03.10 - Raspberry Pi - wiring
Lecture 12 03.20 - Raspberry Pi - BME280 Python module and example
Lecture 13 03.30 - ESP32 - BME280 wiring
Lecture 14 03.40 - ESP32 - BME280 library and example sketch
Section 4: 04 - Add the OLED display
Lecture 15 04.05 - OLED SSD1306 basics
Lecture 16 04.10 - Raspberry Pi - wiring
Lecture 17 04.20 - Raspberry Pi - Python modules and setup
Lecture 18 04.30 - Raspberry Pi - example code
Lecture 19 04.40 - How to install and use custom fonts and sizes
Section 5: 05 - Replace the RF24 with the HC12
Lecture 20 05.05 - Introduction to the HC12 and why replace the nRF24
Lecture 21 05.10 - ESP32 - wiring
Lecture 22 05.20 - ESP32 example sketch and testing
Lecture 23 05.30 - Raspberry Pi - wiring
Lecture 24 05.40 - Raspberry Pi - UART setup and example code
Lecture 25 05.50 - ESP32 & RPi communication via HC12
Lecture 26 05.60 - HC12 configuration with AT commands
Section 6: 06 - Assemble the new hardware
Lecture 27 06.10 - Objectives of this section
Lecture 28 06.20 - Raspberry Pi - Wiring
Lecture 29 06.30 - Raspberry Pi wiring test
Lecture 30 06.40 - ESP32 - wiring
Lecture 31 06.50 - ESP32 wiring testing
Section 7: 07 - Restore the original Full Stack application
Lecture 32 07.05 - Application restoration - Introduction
Lecture 33 07.10 - Install required system modules
Lecture 34 07.20 - Download, compile and install Python 3
Lecture 35 07.30 - Setup the app Python Virtual Environment
Lecture 36 07.40 - Setup Nginx
Lecture 37 07.50 - Setup Flask
Lecture 38 07.60 - UWSGI installation
Lecture 39 07.70 - Nginx configuration
Lecture 40 07.80 - UWSGI configuration
Lecture 41 07.90 - UWSGI and Nginx configuration testing
Lecture 42 07.100 - Configure systemd to auto-start uwsgi
Lecture 43 07.110 - Copy the original application files
Section 8: 08 - Testing and fixing
Lecture 44 08.05 - Introduction and plan
Lecture 45 08.10 - Configure uWSGI to work with the FS app
Lecture 46 08.20 - Setup SQLite3
Lecture 47 08.30 - Install required Python modules
Lecture 48 08.40 - Restore lab_app.py – Part 1: Python modules
Lecture 49 08.41 - Restore lab_app.py – Part 2: Fix lab_temp route
Lecture 50 08.45 - Restore main flask application script – Part 3: Fix lab_env_db route
Lecture 51 08.50 - Restore logger script: env_log.py
Lecture 52 08.60 - Plotly
Lecture 53 08.70 - Google Sheet logger
Lecture 54 08.80 - Remote node receiver script: hc12_receiver.py Part 1 - ESP32
Lecture 55 08.85 - Remote node receiver script: hc12_receiver.py Part 2 - Raspberry Pi
Lecture 56 08.90 - Remote node receiver service
Lecture 57 08.100 - IFTTT
Lecture 58 08.110 - Full test
Section 9: 09 - New features
Lecture 59 09.05 - Introduction and plan
Lecture 60 09.10 - Capture barometric pressure - local
Lecture 61 09.15 - Capture barometric pressure - remote
Lecture 62 09.20 - Show current local barometric pressure
Lecture 63 09.25 - Show historical barometric pressure
Lecture 64 09.30 Upgrade Plotly Part 1 – Setup and the Plotly Graph Object
Lecture 65 09.31 Upgrade Plotly Part 2 – Upgrade implementation
Lecture 66 09.40 Show sensor data on OLED Part 1 – Plan
Lecture 67 09.41 Show sensor data on OLED Part 2 – Setup and base script
Lecture 68 09.42 Show sensor data on OLED Part 3 – Scheduler
Lecture 69 09.50 - Show SD available space on OLED (button press)
Lecture 70 09.60 - OLED display as a service
Lecture 71 09.70 - New PCB for the Raspberry Pi
Lecture 72 09.80 - New PCB for the ESP32
Graduates of the original Raspberry Pi Full Stack course.,Makers looking for a non-trivial Raspberry Pi project.,Makers keen to up-skill their entire skill set, from the operating system to the Internet of Things.