


Integrate Cgi In Live-Action Footage
Integrate Cgi In Live-Action Footage
Published 7/2025
MP4 | Video: h264, 1920x1080 | Audio: AAC, 44.1 KHz
Language: English | Size: 1.95 GB | Duration: 2h 14m
Published 7/2025
MP4 | Video: h264, 1920x1080 | Audio: AAC, 44.1 KHz
Language: English | Size: 1.95 GB | Duration: 2h 14m
Cinema 4D, After Effects, Davinci Resolve
What you'll learn
3D Camera Tracking
CGI Integration in Cinema 4D + Redshift
Rendering AOV Layers
Compositing in After Effects & Davinci Resolve
Requirements
No experience needed. Very Beginner friendly
Description
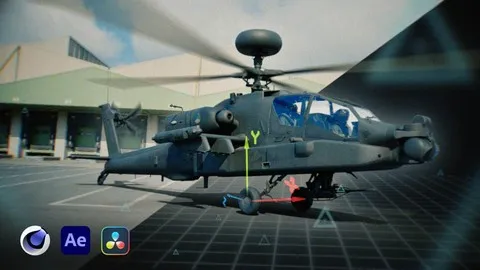
In this Masterclass we will delve into the fascinating world of VFX. Understanding how to seamlessly integrate 3D (CGI) into live-action footage is a crucial skill for any visual effects artist, motion graphic designer, or filmmaker. By the end of this lesson, you will have a solid grasp of the techniques and tools used to place CGI objects in live-action scenes, using Cinema 4D Redshift, Adobe After Effects, and DaVinci Resolve.We will explore the principles of 3D tracking and Compositing that are essential for creating realistic and believable visual effects. You will learn how to match the lighting and perspective of the live-action footage with your 3D objects. Through hands-on exercises and practical examples, you will gain valuable insights into the workflow and best practices for integrating 3D elements into real shots.Whether you are working on a Hollywood blockbuster, a commercial project, or a personal passion project, the skills learned in this masterclass will empower you to create stunning visual effects that captivate audiences and elevate your storytelling capabilities.Key Lesson Concepts:Learn techniques to matchmove 3D objects into live-action footageUnderstand the principles of compositing, and lighting for visual effectsMaster the workflow and best practices for VFX using Cinema 4D Redshift, Adobe After Effects, and DaVinci Resolve
Overview
Section 1: Introductie
Lecture 1 How CGI Integration Works (VFX Breakdown)
Lecture 2 Masterclass Overview and Objectives
Lecture 3 Software and Assets overview
Section 2: 3D Camera Tracking
Lecture 4 Preparing Live-Action Footage
Lecture 5 Setting up Cinema 4D and using Motion Tracker
Lecture 6 3D Solving the Camera
Lecture 7 Fixing Scale & Orientation
Lecture 8 Extra: Using the 3D Camera Tracker in After Effects
Section 3: Texturing 3D models in Redshift
Lecture 9 3D Model Preparation
Lecture 10 Setting up Redshift in Cinema 4D
Lecture 11 Shader basics in Redshift
Lecture 12 Adding Textures and Procedural Shaders
Lecture 13 Quick tip: Storing Selections in Cinema 4D
Section 4: Integrating 3D Objects
Lecture 14 Double check your 3D Tracked Scene
Lecture 15 Importing and Lighting 3D Objects in the Tracked Scene
Lecture 16 Lighting and Shadow Catcher
Section 5: Compositing
Lecture 17 Rendering AOV layers in Cinema 4D Redshift
Lecture 18 Compositing in After Effects using ACES
Section 6: Final VFX shot
Lecture 19 Setting up final VFX shot in Davinci Resolve
Lecture 20 Color grading in Davinci Resolve
Lecture 21 Final touches and Export
Lecture 22 Final VFX shots
Lecture 23 Extra: Car scene
Section 7: Conclusion
Lecture 24 DEBRIEF - Constructive Feedback
Lecture 25 Final Thoughts
Designed for both beginners and senior artists