


Design And Build Your Own Paper Model
Design And Build Your Own Paper Model
Published 4/2023
MP4 | Video: h264, 1280x720 | Audio: AAC, 44.1 KHz
Language: English | Size: 6.75 GB | Duration: 9h 50m
Published 4/2023
MP4 | Video: h264, 1280x720 | Audio: AAC, 44.1 KHz
Language: English | Size: 6.75 GB | Duration: 9h 50m
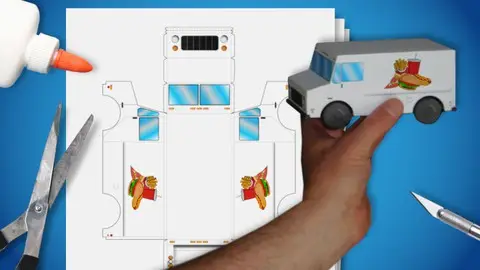
Design and build your own paper models (also known as papercraft or cardstock models) using Blender and Inkscape..
What you'll learn
Make low poly 3D models using Blender
Lay out 3D models as paper models using Blender and Inkscape
Generate UV maps for 3D models using Blender
Build paper models using paper modeling tools and techniques
Paint 3D model textures using Inkscape
Requirements
You should have a desire to learn about 2D/3D computer graphics and their application in the real world. You only need basic desktop or laptop computer skills. Other than that, this course assumes no prior knowledge of Blender or Inkscape. You should have some basic skills: ability to cut out paper shapes with a hobby knife and/or scissors and gluing paper pieces together.
Description
This course will teach you how to design and build your own paper models (also known as papercraft or cardstock models) using the free and open source software applications Blender and Inkscape. This course is for all skill levels. You do not need to know anything about Blender or Inkscape to take this course. All you need is the interest and desire to learn, a desktop or laptop computer with basic graphics capability, a color inkjet printer (or at least access to one) and the necessary materials for the course: 110lb. cardstock, white PVA glue, hobby knife, scissors, tweezers, a surface to cut on like a piece of corrugated cardboard or cutting mat and a variety of colored markers.Researching and learning all of this on your own can be really time consuming and difficult. That's where this course can really help you! This course makes it easy to learn everything you need to know to start designing and building your own paper models from scratch using the most inexpensive means possible. It really is quite satisfying to go from nothing to something you can hold in your hand! In other words, it's an amazing experience to create something in the digital world of the computer and bring it into the physical world!
Overview
Section 1: Blender Basics
Lecture 1 Blender Basics Introduction
Lecture 2 Blender Preferences
Lecture 3 The Blender Interface
Lecture 4 Adding and Deleting Objects
Lecture 5 Navigating the 3D Viewport
Lecture 6 3D Transformations
Lecture 7 Constraining to a Plane
Lecture 8 Applying 3D Transformations
Lecture 9 More Complicated Selections
Lecture 10 Using Toolbar Tools
Lecture 11 The Navigation Gizmo
Lecture 12 How to Edit Objects
Lecture 13 Duplicating Objects and Geometry
Lecture 14 Basic Modeling Operations, Part 1
Lecture 15 Basic Modeling Operations, Part 2
Lecture 16 Basic Modeling Operations, Part 3
Lecture 17 Edge and Face Loop Selection
Lecture 18 Miscellaneous Topics
Lecture 19 Scaling Tricks
Lecture 20 Using Basic Modifiers
Lecture 21 Getting Ready to Render
Lecture 22 Lighting and Rendering
Lecture 23 Setting Up and Using Basic Materials
Lecture 24 Blender Basics Summation
Section 2: A Simple Paper Model
Lecture 25 A Simple Paper Model Introduction
Lecture 26 Attempt to Generate a Cube Paper Model
Lecture 27 Marking and Clearing Seams
Lecture 28 Node Wrangler and Noodle Curve Preferences
Lecture 29 Create Texture and Unwrap Cube
Lecture 30 Paint the Cube Texture
Lecture 31 Export Paper Model from Cube
Lecture 32 Adjust Paper Model and Export as PDF
Lecture 33 Cube Build
Lecture 34 A Simple Paper Model Summation
Section 3: Let's Build a House
Lecture 35 Let's Build a House Introduction
Lecture 36 Model a House
Lecture 37 Model the Steps
Lecture 38 Model the Flower Boxes
Lecture 39 Prepare Model for Unwrapping
Lecture 40 Section 3 Homework Assignment 1
Lecture 41 Section 3 Homework Assignment 1 Solution, Part 1
Lecture 42 Section 3 Homework Assignment 1 Solution, Part 2
Lecture 43 Model Chimney and Export UV Map
Lecture 44 How to Make a Chimney Brick
Lecture 45 How to Make a Foundation Brick
Lecture 46 How to Make a Shingle
Lecture 47 How to Make Tileable Textures, Part 1
Lecture 48 How to Make Tileable Textures, Part 2
Lecture 49 How to Make a Window
Lecture 50 How to Make a Door, Part 1
Lecture 51 How to Make a Door, Part 2
Lecture 52 How to Make a Door, Part 3
Lecture 53 How to Make a Door, Part 4
Lecture 54 How to Make Siding
Lecture 55 Homework Assignment 2
Lecture 56 Putting It All Together, Part 1
Lecture 57 Putting It All Together, Part 2
Lecture 58 Putting It All Together, Part 3
Lecture 59 Putting It All Together, Part 4
Lecture 60 Exporting the Texture
Lecture 61 Apply the Texture and Adjust
Lecture 62 Export the House as a Paper Model
Lecture 63 Arrange Parts and Export as PDF
Section 4: House Build Videos
Lecture 64 House Build, Part 1
Lecture 65 House Build, Part 2
Lecture 66 House Build, Part 3
Lecture 67 House Build, Part 4
Lecture 68 House Build, Part 5
Lecture 69 Let's Build A House Summation
Section 5: Course Summation
Lecture 70 Course Summation
This course is suitable for anyone with an interest in 2D/3D computer grahics that has a desire to bring their creations into the physical world as a real world object. My content is for gamers, artists, crafters, model railroaders and possibly people involved with theatre set design, architectural visualization and manufacturing or anyone else who has similar interests.