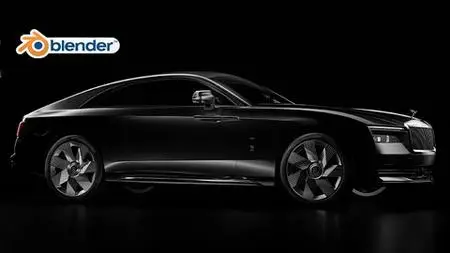
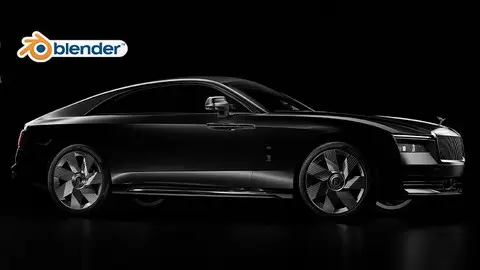
Blender: Rolls Royce Spectre In 3D
Published 12/2023
MP4 | Video: h264, 1920x1080 | Audio: AAC, 44.1 KHz
Language: English | Size: 70.95 GB | Duration: 56h 42m
Published 12/2023
MP4 | Video: h264, 1920x1080 | Audio: AAC, 44.1 KHz
Language: English | Size: 70.95 GB | Duration: 56h 42m
Intermediate Blender: Modeling the Rolls Royce Spectre
What you'll learn
How to create a complex 3D model of the Rolls Royce Spectre using Blender.
Techniques for modeling realistic details and textures, such as the wheels, grill, and headlights.
How to create and apply realistic materials to your 3D model, including metal, plastic, and glass.
Tips for lighting and rendering your model to create stunning, photorealistic images.
Best practices for working with Blender's 3D modeling tools and user interface.
How to use efficient and streamlined methods to create complex objects with ease.
Requirements
A basic understanding of Blender's user interface and 3D modeling tools. Students should have some experience with the software before taking this course.
Familiarity with 3D modeling concepts and terminology, such as polygons, vertices, and UV mapping.
A passion for 3D modeling and a desire to learn new techniques and workflows.
A willingness to put in time and effort to practice and apply the concepts covered in the course.
Description
Rolls Royce in 3D: Mastering Exterior Modeling, Materials, and Rendering in Blender"Embark on a journey of digital craftsmanship as we delve into the art of creating the iconic Rolls Royce Spectre in the dynamic world of 3D. This course is meticulously designed to equip you with the skills needed to expertly model the car's exterior, craft stunning materials, and achieve photorealistic renders using Blender.What You'll Learn:Advanced Exterior Modeling Techniques: Discover a new modeling approach that sets this course apart. Unleash the power of the ShrinkWrap technique in Blender to achieve flawlessly smooth surfaces, capturing every curve and contour of the Rolls Royce Spectre with precision.Procedural Materials: Elevate your creations by mastering the art of procedural materials. Learn to generate realistic textures for every part of the car, from the sleek body to intricate details, using Blender's powerful material nodes.Versatile Rendering Strategies: Explore multiple rendering methods to showcase your masterpiece. Dive into the world of HDRI images and 3D Studio Environments, mastering the techniques to produce breathtaking renders that bring your 3D model to life.Blender 4.0 Light Linking: Stay ahead of the curve with insights into the latest additions to Blender 4.0. Harness the power of light linking to precisely control how light interacts with your model, unlocking new possibilities for realism in your renders.Post-Processing in Photoshop: Elevate your renders to the next level using industry-standard post-processing techniques in Photoshop. Learn to enhance details, adjust lighting, and add that final touch to make your Rolls Royce Spectre truly stand out.Who Should Take This Course:This course is tailored for 3D artists, Blender enthusiasts, and automotive design enthusiasts who aspire to master the art of creating high-quality, realistic 3D car models.Prerequisites:Basic familiarity with Blender's interface and tools is recommended, but the course is structured to accommodate intermediate users.Join us on this creative journey and bring the Rolls Royce Spectre to life in the captivating realm of 3D modeling and rendering. Let's sculpt, texture, and render automotive excellence together!
Overview
Section 1: Introduction
Lecture 1 Introduction
Lecture 2 2_Befor-you- start
Section 2: Modeling
Lecture 3 3_Adding the BluePrints
Lecture 4 4_Modeling the Grill
Lecture 5 5_Starting with the hood
Lecture 6 6_Starting with the fender part 1
Lecture 7 7_Modeling the Fender part 2
Lecture 8 8_Modeling the Fender part 3
Lecture 9 9_Modeling the Fender part 4 focusing on the front side
Lecture 10 10_Modeling the Fender part 5 focusing on the front side
Lecture 11 11_Modeling the lower grill details
Lecture 12 12_Modeling the lower grill details part 2
Lecture 13 13_Modeling the lower grill details part 3
Lecture 14 14_Adding more details to the lower side of the bumper
Lecture 15 15_Modeling the grill ribs
Lecture 16 16_Modeling the middle ribs
Lecture 17 17_Fixing the mesh problems
Lecture 18 18_Creating the guide mesh
Lecture 19 19_Focusing on the back side of the guide mesh
Lecture 20 20_Focusing on the back side of the guide mesh part_2
Lecture 21 21_Starting with the roof and defining the sharp edges of the car
Lecture 22 22_Adding more details for the guide mesh
Lecture 23 23_Adding thickness to the door
Lecture 24 24_Starting with the door handle
Lecture 25 25_Adding thickness to the rear fender
Lecture 26 26_Creating the back light hatch
Lecture 27 27_Creating the rear end panel above the rear bumper
Lecture 28 28_Creating the trunk
Lecture 29 29_Creating the rear window
Lecture 30 30_Creating the roof
Lecture 31 31_Craeting the windshield
Lecture 32 32_Creating the LED head light
Lecture 33 33_Creating the headlight frame
Lecture 34 34_Starting with the headlight details
Lecture 35 35_Headlight details part 2
Lecture 36 36_Finishing the headlight wall
Lecture 37 37_Creating the headlight lens
Lecture 38 38_Crafting a Grill Cover
Lecture 39 39_ Working on the door panels part_1
Lecture 40 40_Working on the door panels part 2
Lecture 41 41_Creating the door handles
Lecture 42 42_Adding details for the door handle
Lecture 43 43_Starting with the door frames
Lecture 44 44_Creating the long door frame
Lecture 45 45_Modeling the rear window frame
Lecture 46 46_Starting with the taillight
Lecture 47 47_Modeling the tailLight frame
Lecture 48 48_Modeling the tail light details
Lecture 49 49_Modeling the TailLight straps
Lecture 50 50_Creating the tail light covers
Lecture 51 51_Creating the splitter
Lecture 52 52_Starting with the Sill guard
Lecture 53 53_Modeling the Sill guard steel frame
Lecture 54 54_Modeling the rear bumper
Lecture 55 55_Rear bumper steel frame
Lecture 56 56_Define the rear bumper sharp edges
Lecture 57 57_Creating the second part of the bumper
Lecture 58 58_Creating the blinkers of the rear bumper
Lecture 59 59_Modeling details underneath the rear bumper
Lecture 60 60_Working on the buttom side of the bumper
Lecture 61 61_Working on the buttom side of the bumper part 2
Lecture 62 62_Prepering the rear fender to create the weel wall
Lecture 63 63_Creating the weel wall
Lecture 64 64_Modeling the floor of the car
Lecture 65 65_Modeling the front weel wall
Lecture 66 66_Starting with the wheels part 1
Lecture 67 67_Modeling the wheels part 2
Lecture 68 68_Defining the edges of the wheels
Lecture 69 69_Defining the edges of the wheels part 2
Lecture 70 70_Finishing the wheel except for the valve steam
Lecture 71 71_Creating valve steam housing
Lecture 72 72_Creating the valve steam
Lecture 73 73_Starting with the tires
Lecture 74 74_Starting with the brake rotor
Lecture 75 75_Starting with the disk calipers
Lecture 76 76_Defining the disk calipers' sharp edges
Lecture 77 77_Finishing the disk caliper
Lecture 78 78_Duplicating the tires and put them in their places
Lecture 79 79_Working on the windows
Lecture 80 80_Starting with the windows
Lecture 81 81_Creating the doors window
Lecture 82 82_Modeling the side mirros
Lecture 83 83_Working on the side mirror part 2
Lecture 84 84_Adding some details to the side mirror cover
Lecture 85 85_Creating the windshield buttom cover
Lecture 86 86_Starting with the wipers
Lecture 87 87_Modeling the wipers part 2
Lecture 88 88_Putting the wipers in place part 3
Lecture 89 89_Adding rubber frames between the panels
Lecture 90 90_Closing the gaps between the panels
Lecture 91 91_Fixing the TailLight
Lecture 92 92_The spirit ecstacy hood gate
Lecture 93 93_Modeling the front Rolls Royce badge
Lecture 94 94_Modeling the side badge part 1
Lecture 95 95_Finishing the side badge part 2
Lecture 96 96_Starting with the rear badge
Lecture 97 97_Rear badge part 2
Lecture 98 98_Modeling the license plate light source
Lecture 99 99_Modeling the license plate light source part 2
Lecture 100 100_Creating the rear sensors
Lecture 101 101_Creating the front sensors
Lecture 102 102_Creating the front bumper hook cover
Lecture 103 103_Creating the charging gate
Lecture 104 104_Creating the front camera.mp4
Lecture 105 105_Creating the side and rear cameras
Lecture 106 106_Simple interior
Lecture 107 107_Fixing some problems
Lecture 108 108_Fixing some problems part 2
Lecture 109 109_Modeling the windshield borders
Lecture 110 110_Modeling the rear window border
Lecture 111 111_Adding the Spirit of Ecstacy
Section 3: Materials
Lecture 112 112_Illuminating the scene using HDRI image
Lecture 113 113_Materials_Chrome and Wheel wall MT
Lecture 114 114_Creating multiple materials for multiple objects
Lecture 115 115_Creating the wheels mateial
Lecture 116 116_Disk Brake material
Lecture 117 117_Creating the car paint material
Lecture 118 118_Creating the tires material
Lecture 119 119_Creating the Disk calipers material
Lecture 120 120_Creating the Badge material
Lecture 121 121_Starting with the badge light mt
Lecture 122 122_Starting with the tail light part 1
Lecture 123 123_Tail Light part 2
Lecture 124 124_Rear side lights material
Lecture 125 125_HeadLight materials
Lecture 126 126_Windows and interior materials
Section 4: Simple Rig
Lecture 127 127_Simple rig part 1
Lecture 128 128_Simple rig part 2
Section 5: Environment and rendering
Lecture 129 129_Rendering_making the first render
Lecture 130 130_Post-procesing using Photoshop
Lecture 131 131_Using different HDRI image and make a new render
Lecture 132 132_Studio Render part 1
Lecture 133 133_Studio Render part 2
Lecture 134 134_Studio Render part 3
Section 6: Project files
Lecture 135 Project files
Intermediate to advanced 3D artists who want to take their skills to the next level and learn advanced modeling techniques.,Professionals or students in the fields of architecture, product design, or entertainment who want to create realistic 3D models for their projects.


