Kelby Training - Learn Automotive Photography in a Flash
Kelby Training - Learn Automotive Photography in a Flash
English | h264, yuv420p, 1280x720, 1764 kb/s, 29.97 fps | aac, 44100 Hz, 1 channels, s16, 64 kb/s | 1.37 GB
Genre: eLearning
English | h264, yuv420p, 1280x720, 1764 kb/s, 29.97 fps | aac, 44100 Hz, 1 channels, s16, 64 kb/s | 1.37 GB
Genre: eLearning
Meet up with Tim Wallace, international advertising and automotive photographer, and a Ford Fairlane to learn what is possible for shooting cars with just one camera, one lens, and one speed light. You’ll learn about the gear he uses, the importance of choosing a location that matches your subject, and through the power of Photoshop layer masks, how creative your lighting possibilities can be with just one light..
Learn Automotive Photography in a Flash Include:
Choosing a Location [05:00]
Join Tim on location as he introduces the concepts covered in this class and jumps right into walking through his process for choosing the location that matches his subject matter.
Essential Gear [04:01]
This class is focused on using a minimal amount of gear, and Tim walks through what he'll be using for this shoot.
Positioning the Camera [10:32]
The final photograph will be a composite of multiple exposures, so the most important step involves choosing the location for the camera and locking it down.
Begin Lighting the Car [09:18]
Start with taking a base ambient exposure [without using the flash], then begin systematically lighting the car.
Adding a Rim Light [07:54]
Adding a rim light along the far side of the car will help set it off from the background.
Lighting the Interior [06:50]
Lighting the interior is optional, but is worth considering.
Lighting the Environment [05:36]
Using a red gel on the flash from the vantage point of the brake light can be used to simulate light from the car, while using a blue gel on the flash to light the background can be useful for adding a touch of color to the scene.
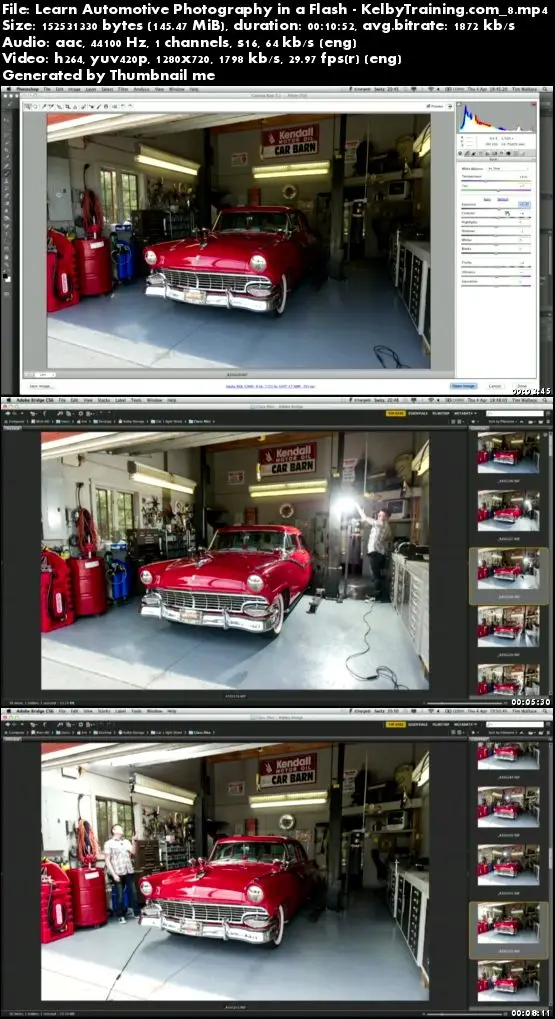
Image Review [10:55]
Back in the studio it is time to review all of the photos captured on location, start making your selects, and then begin working on your base image.
Layering in Additional Exposures [09:01]
With your base layer started you can begin going back through your selects and building up toward your final image.
Bringing in the Interior Lighting [09:31]
Using the same layer mask technique you can combine the exposure of the lit interior with the base image.
Bringing in the Brake Light [07:19]
The next phase is to bring in the exposures made to simulate the brake lights on the car.
Bringing in the Background [12:41]
Tim lit the background in two different ways (once with blue gel and once without), and now has to choose which look he prefers before layering it into the base image.
Enhancing Detail [06:38]
The final phase of the project is to enhance detail in the image.
Course Time: 01 Hours 45 Minutes
Screenshot
Kelby Training - Learn Automotive Photography in a Flash