

cmiVFX - Houdini Camera Projection Techniques

cmiVFX - Houdini Camera Projection Techniques
English | MP4 + project files | 1024 x 576 | AVC ~550 kbps | 12 fps
AAC | 38.0 kbps | 22.05 KHz | 1 channel | 3h 39min | 933 MB
AAC | 38.0 kbps | 22.05 KHz | 1 channel | 3h 39min | 933 MB
Genre: Video Tutorial / 3D-graphics
A voice in the dark background emanates a whisper by saying softly, "They say it couldn't be done….." BAMM! Another HOT one for HOUDINI by …. wait for it…… CMIVFX! Where you really expecting something else? Of course not…. but enough of the chatter, let's get down to Earth and talk about what we have for you today. One of the most efficient ways to get complex looking CG is rarely CG at all. The use of projections are used in all aspects of the Visual Effects industry. Whether its taking 2D and turning it into Stereoscopic, or simply using multiple camera projections for modeling a detailed point cloud for analysis and measurement calculations in a digital set, the world has found that using photographic camera projections are the best way to get complex looking realism into a shot with the least amount of effort. The amount of detail that goes into camera projection modeling is up to the end users requirements for a shot. In some cases, highly detailed geometry can be created using several images so that simulations can be calculated on the resulting geometry's surface. In this brand new video from cmiVFX, you will learn from scratch, how to start using camera projections in Houdini to better enrich your projects today. Now with version 12 of Houdini, the ability to utilize the openGL view for super fast rendering of projection building has never been as useful as it is today. Find out how to make the best of projections today with our in-house Houdini Genius, VAROMIX. By the end of this ride, you will be building yourself a new and improved demo reel section in a jiffy!!Contents:
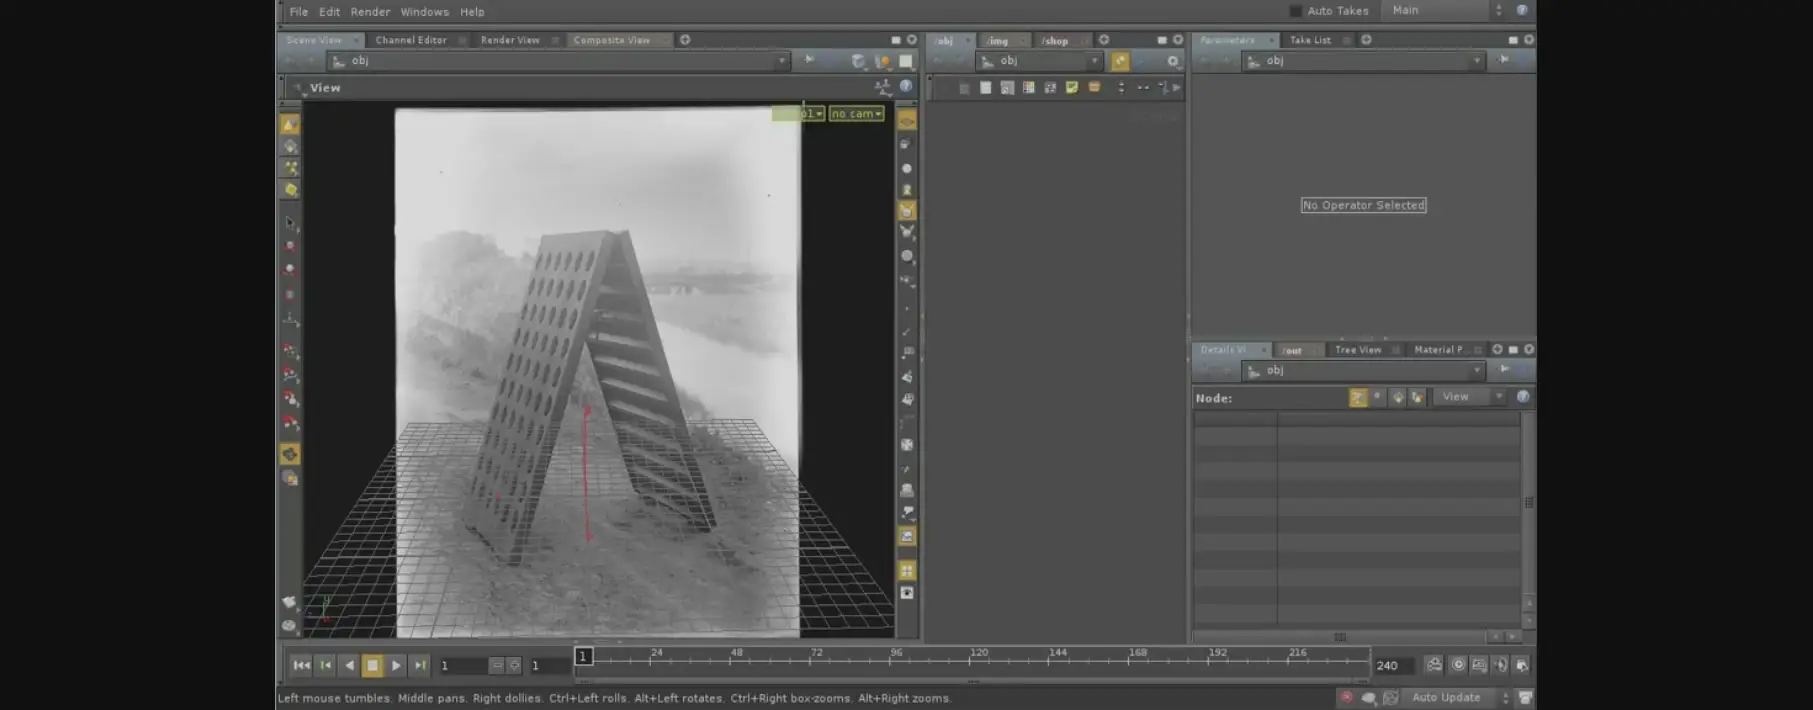
Project One - Champagne Shaking Table
If you're anything like us, we didn't know what a Champagne Shaking Table was either, so naturally we had to turn that into a project. In this particular project, we’ll start simple, very, very simple. Key concepts in this part of the video will be setting the camera to the correct resolution and focal length which allows us to end up with a simple but complete scene that has all the basic properties one might expect.
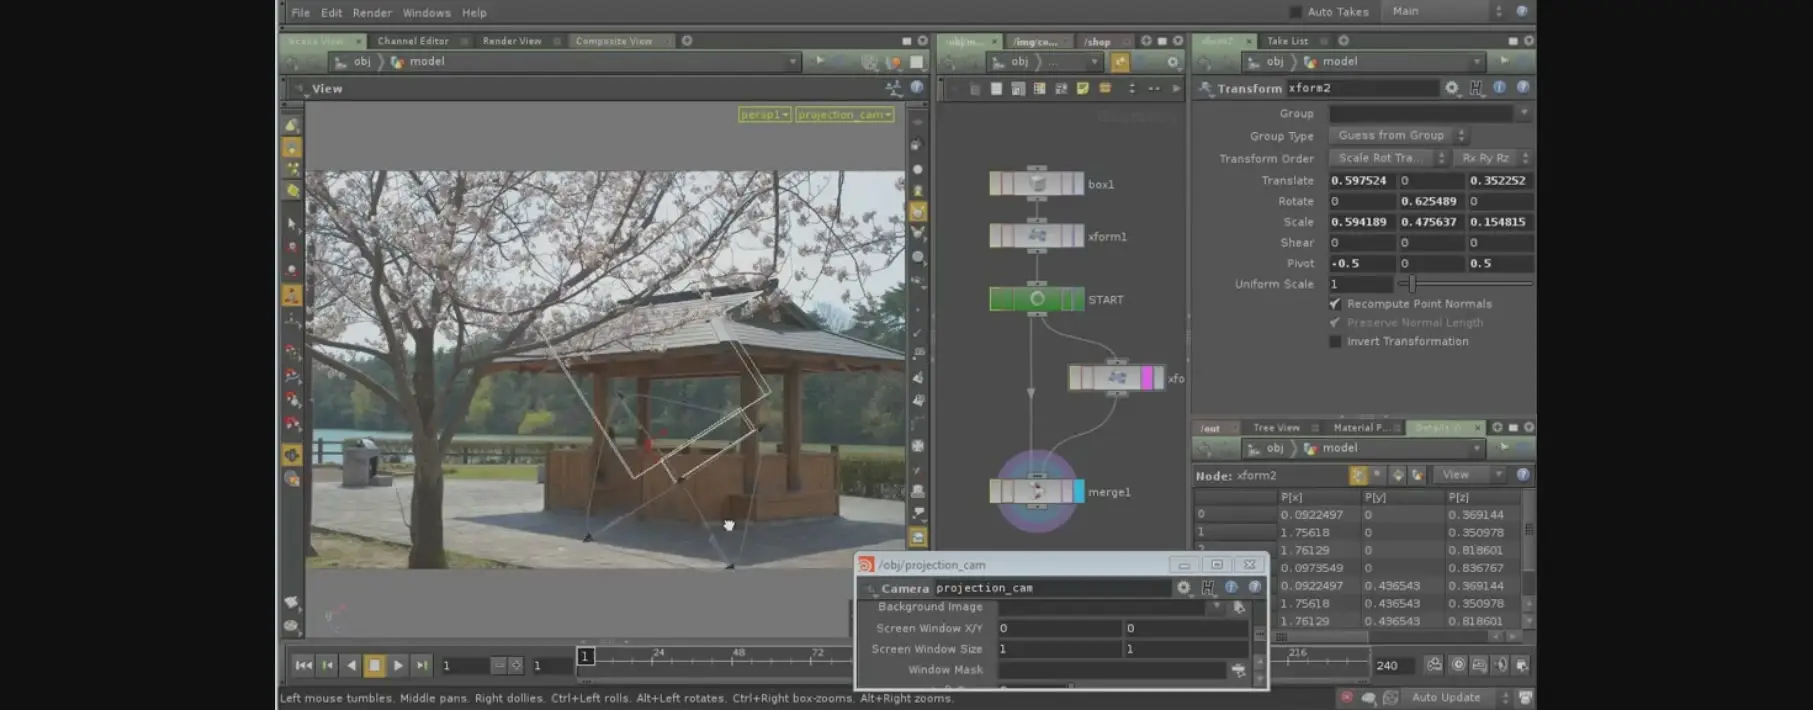
Project Two - Japanese Park
Now we get into a more complex scene with multiple planes in 3D space. In a production environment, its actually called a Multi-Plane project, so terminology can stay consistent to what you might expect. What makes it qualified to carry the name, you will see how the photo preparation was made, and the cleaning up of the layers so that you can maintain parallax throughout an animation. The main goal here is to showcase the functionality of the process so you can better follow along with more detailed concepts in the third project.
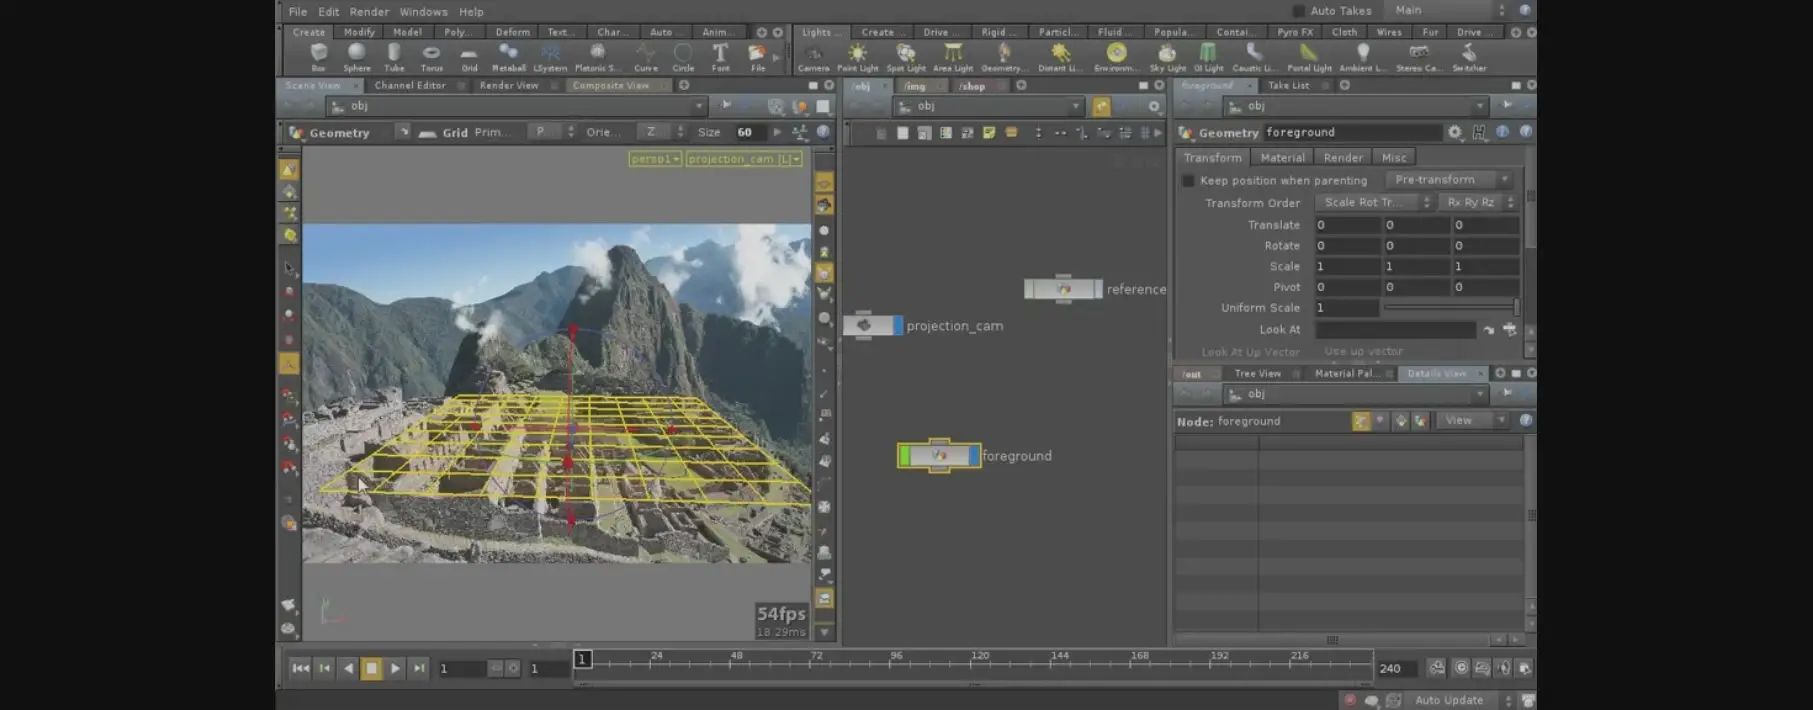
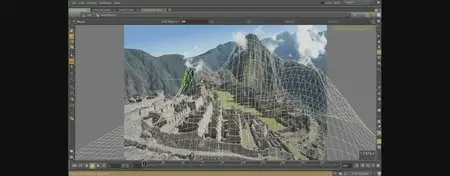
Project Three - Machu Picchu
Timing is always everything in this business, from literal key framing to getting as lucky to have Chris Maynard already be in the middle of a High Resolution Matte Painting Restoration project that he donated for the final project. This project was not 100% complete when we gained access to the materials, but it demonstrates a killer view on creating and painting restoration of layers in photoshop. This master image originally had hundreds of people all around it, blocking key elements that need to be modeled. Fortunately, Chris had already painted out all the people and extracted all the layers including the clouds to maintain a healthy believable high resolution simulated camera movement through z space. Varomix then brings it to life using Houdini's power procedural tools by modeling complex surfaces and simple one alike. If that isn't quite enough for you, Varomix busts out some volumetric clouds to replace the hand painted 2d layered ones that Chris was using. Now even you can work with us by adding your own final touches to the masterpiece. We urge you to follow along and create an even higher detailed scene with all the tricks you have been learning at the cmiVFX website, and send us the samples! The best student samples will be posted on the website in a few months time!
Bonus Chapter: Simple Python Script To Replace Paths
We finish with a bonus chapter, in this portion of the video, we create a simple but very useful python script that helps us replace absolute paths from our shader to relative paths. This makes for a more solid .hip file that can be opened in any OS on the network or even be shared around the world with other artists.
Final Words
As always we hope that you find this title useful, Varomix had a blast doing this and as always we are taking any questions/comments/suggestions.
About The Artists
Alvaro Castañeda, best known as "varomix" is a CG Generalist TD. He lost a little of his self back in 1993 at a Jurassic Park screening, and that totally changed his life. Toy Story finished the job in 1995 - there was no turning back!. He started his way in 3D back in 1998, first using 3ds Max, then Cinema4D and finally in 1999 I met Maya 2.0. Since then I've done CGI for print, web, TV, Film, DVD, I guess anything that has pixels in it!. He started using Houdini in 2002 shortly after Side Effects launched the Houdini Apprentice Program. He had also done on-set VFX Supervision and DOP Assisting. Varomix is also assisting in the future development of the cmiVFX website and features there in.
Chris Maynard, best known as the owner of cmiVFX contributed the Machu Picchu matte painting in layers to be used by any and all customers of cmiVFX for self promotion or practice. Chris is a ten time, New Media Award winning designer for Multi-Media based User-Interface Designs, and has been and integral part of the development of dozens of third party graphics applications for the Computer Graphics and Visual Effects industry. There is a 99.9% chance that you are using or have used at least on other part of one of his creations outside of the cmiVFX website.
You will see a lot more from both artists in the near future.
Project Contents
All cmiVFX videos come with all the training materials you can need right from our website. No matter what time of day, your location, or how your feeling, cmiVFX will be there waiting for you!
More info: http://www.cmivfx.com/tutorial...i+Camera+Projection+Techniques
project files are included
General
Complete name : Houdini Camera Projection Techniques.MP4
Format : MPEG-4
Format profile : Base Media
Codec ID : isom
File size : 891 MiB
Duration : 3h 29mn
Overall bit rate : 596 Kbps
Writing application : Lavf52.71.0
Video #1
ID : 1
Format : AVC
Format/Info : Advanced Video Codec
Format profile : Baseline@L1.3
Format settings, CABAC : No
Format settings, ReFrames : 5 frames
Codec ID : avc1
Codec ID/Info : Advanced Video Coding
Duration : 3h 29mn
Bit rate mode : Variable
Bit rate : 550 Kbps
Width : 1 024 pixels
Height : 576 pixels
Display aspect ratio : 16:9
Frame rate mode : Constant
Frame rate : 12.000 fps
Color space : YUV
Chroma subsampling : 4:2:0
Bit depth : 8 bits
Scan type : Progressive
Bits/(Pixel*Frame) : 0.078
Stream size : 831 MiB (93%)
Writing library : x264 core 98
Encoding settings : cabac=0 / ref=5 / deblock=1:0:0 / analyse=0x1:0x111 / me=dia / subme=5 / psy=1 / psy_rd=0.00:0.00 / mixed_ref=1 / me_range=16 / chroma_me=1 / trellis=0 / 8x8dct=0 / cqm=0 / deadzone=21,11 / fast_pskip=1 / chroma_qp_offset=0 / threads=22 / sliced_threads=0 / nr=0 / decimate=1 / interlaced=0 / constrained_intra=0 / bframes=0 / weightp=0 / keyint=12 / keyint_min=7 / scenecut=40 / intra_refresh=0 / rc_lookahead=12 / rc=abr / mbtree=1 / bitrate=550 / ratetol=7.3 / qcomp=0.60 / qpmin=10 / qpmax=51 / qpstep=4 / ip_ratio=1.41 / aq=1:1.00
Language : English
Audio #2
ID : 2
Format : AAC
Format/Info : Advanced Audio Codec
Format profile : LC
Codec ID : 40
Duration : 3h 29mn
Bit rate mode : Variable
Bit rate : 38.0 Kbps
Channel(s) : 1 channel
Channel positions : Front: C
Sampling rate : 22.05 KHz
Compression mode : Lossy
Stream size : 56.8 MiB (6%)
Language : English
Screenshots

cmiVFX - Houdini Camera Projection Techniques

cmiVFX - Houdini Camera Projection Techniques

cmiVFX - Houdini Camera Projection Techniques
cmiVFX - Houdini Camera Projection Techniques

For more, Visit my AH-blog
no mirrors please, Follow The Rules