Hands On Projects With The I2C Protocol - Learn By Doing!
Last updated 10/2019
MP4 | Video: h264, 1280x720 | Audio: AAC, 44.1 KHz
Language: English | Size: 1.08 GB | Duration: 4h 6m
Last updated 10/2019
MP4 | Video: h264, 1280x720 | Audio: AAC, 44.1 KHz
Language: English | Size: 1.08 GB | Duration: 4h 6m
Gain a deep understanding of the I2C and GPIO peripherals with hands on embedded systems projects using STM32
What you'll learn
Be able to set up I2C communication between microcontrollers and thousands of I2C devices available in the market
Understand how OLED displays work and know how to display content on them
Gain a deep understanding of how to set up I2C communication between a STM32 Nucleo microcontroller and a Linear Technologies LTC2990 Current, Voltage and Temperature sensor
Understand how to enable GPIO input to read input into the microcontroller from push buttons
Understand Hardware Abstraction Layer (HAL) Libraries and how to use them
Feel confident and comfortable programming applications on the Cortex-M platform
Read datasheets for I2C slave devices to figure out how to make them work with a microcontroller master
Requirements
Basic knowledge of embedded systems
STM32 Nucleo development board is recommended, but not mandatory
MakerMax I2C development board is recommended, but not mandatory
Basic understanding of the ARM Cortex processor fundamentals
Description
Welcome to this course on embedded systems for STM32: I2C protocol masterclass. The I2C communication protocol is a popular protocol that microcontrollers use to talk to various devices such as EEPROMS and NVRAMs, ADCs and DACs, I/O interfaces for port expansion, and a whole array of different types of sensors. This class goes in-depth into the theory behind the I2C protocol, why it was originally designed, what types of common formats are available, and how to implement I2C communication between a STM32 microcontroller, a LTC2990 current, voltage and temperature sensor and an OLED display.
Who am I?
I’m Akshay, and I’ll be your instructor for this course. I have been fascinated with micro controllers since I was a child, and now I consider it lucky to have it as my profession. I currently write firmware for safety critical systems that go inside electric cars. With my knowledge of embedded systems over the past 10+ years, and working in Silicon Valley, I have gained a unique insight into what the industry needs and what the students are lacking.
Course Structure
The course is divided into four sections -
Section 1 - In this section you will learn the theory behind the I2C protocol and how to implement it effectively.
Section 2 - In this section you will set up a free and open source development environment to program and debug ARM Cortex microcontrollers. If you have previously completed my course on the Foundations of ARM Cortex-M processors, then you may choose to skip to the next section.
Section 3 - In this section you will get hands-on experience on how to write the I2C drivers for the LTC2990 temperature, current and voltage sensor and the SSD1306 OLED display. You can take the knowledge learned in this section and apply it to any other I2C device of your choosing.
Section 4 - In this section you will unlock features of the I2C Shield with specially designed assignments. After each assignment I will show you my method of implementation for comparison.
What hardware is needed for this course?
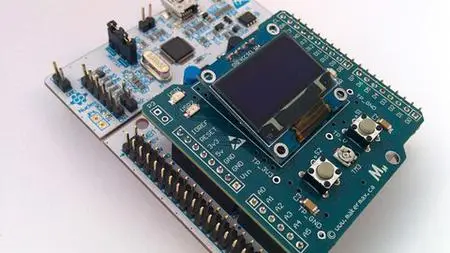
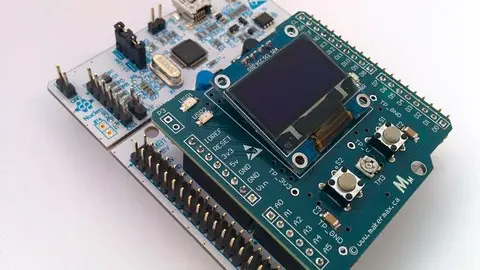
This course is created around the Nucleo series of boards from ST Microelectronics and I have designed, specifically for this course a custom board that fits on top of the Nucleo board. The Nucleo board is available for purchase directly from ST Micro and the custom I2C board can be purchased on www(dot)makermax(dot)ca to allow you to get hands-on without having a whole electronics lab at your desk. Although this hardware is recommended, it is not mandatory. If you choose not to buy the hardware, you will still be able to follow along through all the lectures as I will show you my implementation. The best way to learn however, is to try and implement it yourself. If you have further questions on the hardware or anything else, send me a message! I would be more than happy to help you.
Overview
Section 1: Introduction
Lecture 1 Before we get started!
Lecture 2 Course Introduction
Section 2: I2C Protocol Theory
Lecture 3 Section 1 Introduction
Lecture 4 I2C Protocol Primer
Lecture 5 I2C Connections
Lecture 6 Calculation of Pull-up Resistance
Lecture 7 Guidelines
Lecture 8 Effects of bus capacitance
Lecture 9 Commonly used I2C Formats
Lecture 10 Course reference documents
Lecture 11 LTC2990 Read Protocol Analysis
Lecture 12 About the hardware
Lecture 13 Purchasing the hardware
Section 3: Development Environment - Atollic
Lecture 14 Alternate Development Environment Setup and Exercises
Lecture 15 Alternate Development Environment Handout
Section 4: Hands-on lab sessions
Lecture 16 Section 3 Introduction
Lecture 17 Installing STCubeMx
Lecture 18 Setting up the STCubeMx Project to work with MakerMax I2C Shield
Lecture 19 Writing the I2C Read Driver for LTC2990
Lecture 20 Using the I2C Driver to read the supply voltage from LTC2990 slave
Lecture 21 Using I2C Write to configure the LTC2990
Lecture 22 Writing the I2C Driver for SSD1306 controller
Section 5: Unlocking the full potential of the I2C shield
Lecture 23 Section 4 Introduction
Lecture 24 Challenge 1 - Unlocking real time temperature sensing
Lecture 25 Challenge 1 Solution - Unlocking real time temperature sensing
Lecture 26 Improving the OLED display
Lecture 27 Configuring the LTC2990 Control Register
Lecture 28 Challenge 2 - Unlocking potentiometer analog input
Lecture 29 Challenge 2 solution - Unlocking potentiometer analog input
Lecture 30 Challenge 3 - Unlocking processor current sensing
Lecture 31 Challenge 3 solution - Unlocking processor current sensing
Lecture 32 Challenge 4 - Unlocking push button digital input
Lecture 33 Challenge 4 solution - Unlocking push button digital input
Section 6: Closing Notes
Lecture 34 Guidelines
Lecture 35 Congratulations and Thank you!
Section 7: Setting up the development environment (optional)
Lecture 36 Section 2 Introduction
Lecture 37 Setting up the virtual machine
Lecture 38 Setting up Linux OS on the virtual machine
Lecture 39 Setting up the Eclipse development environment
Lecture 40 Setting up the development toolchain
Lecture 41 Creating a blinky project
Lecture 42 Setting up the open source debugger (Part 1 of 2)
Lecture 43 Setting up the open source debugger (Part 2 of 2)
Lecture 44 Running the blinky project
Lecture 45 FAQ and Troubleshooting
An embedded systems enthusiast, professional or student who wants to explore the peripherals of a microcontroller,If you wish to master the I2C communication protocol,If you wish to gain a deep understanding of the GPIO peripheral,Already been working with ARM Cortex microcontrollers and want to gain a deeper understanding of the processor's peripherals


