

Create Transparent Powerpoint Animations For Your Videos

Create Transparent Powerpoint Animations For Your Videos
Last updated 5/2022
MP4 | Video: h264, 1280x720 | Audio: AAC, 44.1 KHz
Language: English | Size: 3.15 GB | Duration: 4h 21m
Last updated 5/2022
MP4 | Video: h264, 1280x720 | Audio: AAC, 44.1 KHz
Language: English | Size: 3.15 GB | Duration: 4h 21m
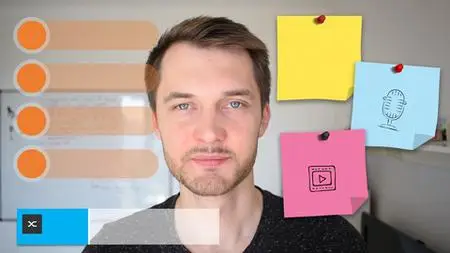
Create transparent animations and lower thirds on top of your talking head videos with Powerpoint and Adobe Premiere
What you'll learn
Make your Talking Head videos more dynamic and eye-catching
Create animated infographics and lower thirds using Powerpoint
Make your infographics transparent and add them on top of your Talking Head videos
Learn the full potential of Powerpoint animations
Requirements
Access to Powerpoint, ideally Office 365 version
Access to Adobe Premiere…
… or another video editing software that can do a transparency effect (but result not guaranteed)
Description
Use this course as a tool kit to improve the quality of your talking head videos by adding transparent infographics and "lower thirds". You will create these graphics using Powerpoint and make them transparent using Adobe Premiere. Some other video editors can also create the transparency effect, but the same good result as with Adobe Premiere is NOT guaranteed. So if you don't have Adobe Premiere, do make sure that your video editing software can create the transparency effect (check the list at the bottom). In this course we're going to create:2 Lists 2 Name/titles1 "Post-it" effect1 "Polaroid" Photo effectThese graphics can be used for your YouTube videos, Online courses, Business/Marketing videos, Interview Videos and more. Basically, whenever a person is talking on camera.You will learn how to create these graphics with Powerpoint only, and you will probably be surprised how powerful Powerpoint can be. And even though you won't be able to create the most complex effects that can be done with specialized animation software, Powerpoint is a great compromise in terms of quality and creation speed. Once you learn how it works, you will be able to create many other infographics for your videos relatively fast.However, you will need a video editing software that can do a "Remove Color" effect to make it transparent and add on top of your talking head video, and most decent software can do it. However, not all of them give the same results. For example, Camtasia "remove color" effect is not as good as Adobe Premiere's "Ultra Key" - some shadows don't work, you need to do much more adjustments, but it's still possible. So here is a limited list of software that have *some version* of this effect. If your software is not listed here, it doesn't mean that it can't do it. In that case you should check it for yourself on the internet if this is possible or not. Otherwise, write me privately and I will do the research for you and update the list below.Adobe Premiere Camtasia Filmora Corel VideoStudioFinal Cut Pro Pinnacle StudioFor everything else, check the Promo and the Free Preview videos of this course![Created by Business Disruptors]
Overview
Section 1: Introduction
Lecture 1 Introduction
Lecture 2 Download all the Powerpoint files (if you want to!)
Section 2: Project 1 - Transparent animated list
Lecture 3 Setting the background
Lecture 4 Creating the list and getting icons
Lecture 5 Finishing the base list + Useful Powerpoint tricks
Lecture 6 Animating the first title of the list
Lecture 7 Copying animations on the remaining titles
Lecture 8 Setting the transparency and exporting Powerpoint video file
Lecture 9 Before you move onto the next lesson…
Lecture 10 Premiere - How to import video files on the editing timeline
Lecture 11 Premiere - How to make the Powerpoint video transparent
Lecture 12 Premiere - Editing Powerpoint video on top of the face video
Lecture 13 Premiere - Exporting the final video
Section 3: Project 2 - A fancier, more colorful animated list
Lecture 14 List 2 Introduction
Lecture 15 Creating the basic list shapes
Lecture 16 Inserting text and downloading new fonts
Lecture 17 Animating the list titles
Lecture 18 REPEAT - Setting the transparency and Exporting PPT Video
Lecture 19 REPEAT - Adobe Premiere - Transparency
Lecture 20 Adobe Premiere - Settings of the Transparency Effect
Section 4: Project 3 - Presenter's Name and Title with Typing Effect
Lecture 21 REPEAT - Setting the background
Lecture 22 Adding the base text for the Name
Lecture 23 Animating the Vertical Bar and the Name
Lecture 24 Creating the Typing Effect by moving the Vertical Bar
Lecture 25 Adding the base text for the Professional Title
Lecture 26 Animating the Vertical Bar of the Professional Title
Lecture 27 Making the Titles disappear nicely
Lecture 28 REPEAT - Setting the transparency and exporting Powerpoint video file
Lecture 29 REPEAT - Adobe Premiere - Importing video files and setting transparency
Lecture 30 REPEAT - Premiere - Basic Video Editing and Exporting of the Final Video File
Lecture 31 Conclusion of the TITLES Video Project
Section 5: Project 4 - More colorful title for Presenter's Name and Logo
Lecture 32 Introduction to Presenter's Title variant 2
Lecture 33 First shapes and Selection Tool
Lecture 34 Inserting Logo and Text
Lecture 35 Finishing all the Shapes and Texts
Lecture 36 Animations Part 1
Lecture 37 Animations Part 2
Lecture 38 REPEAT - Setting the transparency and Exporting PPT Video
Lecture 39 REPEAT - Adobe Premiere - Transparency and Exporting
Section 6: Project 5 - Video Post-its
Lecture 40 Creating a custom Post-it shape
Lecture 41 Duplicating Post-it shapes and finding realistic colors
Lecture 42 Creating a realistic pattern for the Post-its
Lecture 43 Creating a hand written and hand drawn effect of the Post-its
Lecture 44 Finding a realistic pin and effect
Lecture 45 Animating the Post-its
Lecture 46 REPEAT - Setting the transparency and Exporting PPT Video
Lecture 47 REPEAT - Adobe Premiere - Transparency, Editing and Video Exporting
Section 7: Project 6 - Polaroid photo effect for pictures
Lecture 48 Introduction to Polaroid photos effect
Lecture 49 REPEAT - Setting the background pattern
Lecture 50 Creating the base shape
Lecture 51 Create a custom bent shadow
Lecture 52 Finishing the base shape
Lecture 53 Adding clip icons
Lecture 54 Adding titles and finalizing the shapes
Lecture 55 Animating the Polaroid photos
Lecture 56 REPEAT - Setting the transparency and Exporting PPT Video
Lecture 57 REPEAT - Adobe Premiere - Transparency, Editing and Video Exporting
Section 8: Technical recap - All editing in Powerpoint and Adobe Premiere
Lecture 58 Technical Recap - Introduction
Lecture 59 Setting the Powerpoint frame from your Talking Head video
Lecture 60 Preparing the Powerpoint file for video export
Lecture 61 Adobe Premiere - Adding video files, removing the green color and adjusting
Lecture 62 Adobe Premiere - Editing and Exporting
Lecture 63 If you DON'T have Adobe Premiere - Camtasia example
Section 9: Before you go…
Lecture 64 BONUS: Everything I recommend
YouTubers who want to improve the quality of their Talking Head videos,Online instructors who want to augment their Talking Head videos,Anyone doing video editing of Talking Head videos,Anyone wanting to add a new skill to their marketing skills portfolio