

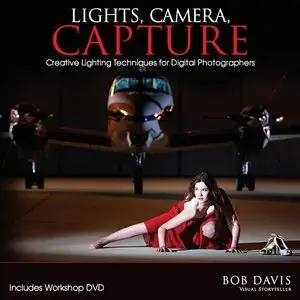
Bob Davis, "Lights, Camera, Capture: Creative Lighting Techniques for Digital Photographers"

Bob Davis, "Lights, Camera, Capture: Creative Lighting Techniques for Digital Photographers"
2010 | ISBN: 047054953X | 240 pages | PDF + DVD | 8,4 MB + 2.3 Gb
DVD: English | Duration: 60m | MPEG2 | 720x480 | 29.97fps 5283kbps | AC3 192kbps 48.0KHz
Author Bob Davis is a photographer whose high-profile clients include Oprah Winfrey and Eva Longoria, and whose work has appeared in Time, O Magazine, and People. Along with his invaluable professional advice, this beautiful full-color book includes a DVD featuring portions of his workshop curriculum. He covers the elements of lighting and shares his two-strobe technique that will enable you to create studio-quality lighting anywhere with only minimal equipment.
High-profile photographer Bob Davis is especially known for his lighting techniques; this book shares his advice on lighting for professional photographers and serious amateurs
Covers all the key elements of photographic lighting, with informative illustrations and lighting grids
Details the author's pioneering two-strobe technique that reduces the amount of equipment a photographer must carry to a shoot and dramatically lowers equipment costs
Features professional tips and stunning full-color images
60-Minute DVD includes video from the author's three-day lighting and photography workshop
Lights, Camera, Capture: Creative Lighting Techniques for Digital Photographersoffers your professional advice worth many times the cost of the book.
Top 10 Lighting Tips
1. Become a seeker of light. My lighting improved leaps and bounds once I began to notice and study light and how it creates mood, shapes, and defines textures. It’s all about light. I take mental notes when light catches my eye. I love the way the sunlight reflects off my stone counter tops and creates beautiful patterns on the kitchen cabinets. I then think of how can I emulate that.
2. Take visual notes using your cell phone camera. I love using my iPhone for this. Most people have a camera on their cell phone; it’s great for capturing those wonderful moments when the light catches your eye. Later, practice recreating that light with any type of light source, flashlight, shop light, strobe or video light.
3. Practice, practice, practice… I use a teddy bear and a flashlight to see how the light and shadows change as I move the light around the teddy bear. Then, I try to create that same look using an off-camera flash.
4. If you find using an off-camera flash a challenge because you can’t see the light, try using a flashlight as a modeling light. Point the flashlight in the same direction as your flash head. For a long time, I used a Mag light rubber banded to my Speedlight until I became comfortable using my flash.
5. Use a diffuser over your flash and, if at all possible, bounce your flash. Even the pop-up flash on a point-and-shoot can be diffused using facial tissue. If your flash has an adjustable head, try bouncing it off the ceiling by pointing the flash head upwards, or even to the side if there is a wall near by. Review your results, and make a mental note.
6. Whenever possible, get your flash off-camera. You can create depth and dimension by getting one flash with a bounce diffuser about 45 degrees to the left or right of your camera. This creates a nice modeling light to shape your subjects, and looks more natural than direct on-camera flash.
7. Read you camera and flash manual. I know they read like bad stereo instructions written for engineers, but if you read one page, and then practice what you’ve just read with your camera and flash, soon you will master all of the functions of your flash.
8. Use fresh batteries; even better, use rechargeable high capacity batteries. This alone will greatly improve your overall flash consistency.
9. Use flash outside on a bright sunny day to fill in the shadows under the eyes, hence the term “fill flash”. Photograph people in open shade to avoid them having to squint, and remember to turn on your flash to fill in their face with light. Almost all point-and-shoot cameras allow you to use your flash outside. Give it a try, and see how it puts that sparkle in their eyes.
10. You don’t always need a flash, I love lighting people using a reflector. There are many types of collapsible reflectors. You can use anything as a reflector. I once created a reflector in a pinch by using a paper plate and covered it with aluminum foil. It works! Remember it’s all about the light. Have fun, there is no wrong way to light; there are no rules written in stone. Create the light you want!
Tips for Using Strobe Lights
Strobes give you an incredible sense of flexibility in your approach to light, largely due to the many different ways you can manipulate and adjust their output.
Your flexibility increases significantly if you are able to move the flash away from the camera's hotshoe, because you can position it exactly where you would like it. Add more flashes to the mix, and you’re straying into more creative territory… This is your cue to take control of your lighting! Create the light you want anywhere.
What’s on the DVD
The following sections provide a summary of the materials you’ll find on the DVD.
Chapter 1: Behind the Workshop
Chapter 2: Seeker of Light
Chapter 3: Evolution of Light
Chapter 4: E-TTL vs. Manual
Chapter 5: Setting Up Strobes
Chapter 6: High-Speed Flash Sync
Chapter 7: Mastering Camera Modes
Chapter 8: Reading the Histogram
Chapter 9: Lessons Learned
Chapter 10: Credits