


Blender: Create 3D Game Assets
Blender: Create 3D Game Assets
Last updated 11/2020
MP4 | Video: h264, 1280x720 | Audio: AAC, 44.1 KHz
Language: English | Size: 8.22 GB | Duration: 9h 39m
Last updated 11/2020
MP4 | Video: h264, 1280x720 | Audio: AAC, 44.1 KHz
Language: English | Size: 8.22 GB | Duration: 9h 39m
Create your own 3D game models with fun and ease
What you'll learn
AAA 3D game asset pipeline
Searching for the right reference material
3D Modeling
Texturing
UV Unwrapping
Creating a high-poly 3D model
Creating a low-poly 3D model
Bake all the high-poly details on top of the low-poly 3D model
Requirements
Have Blender installed
Have Substance painter installed
Description
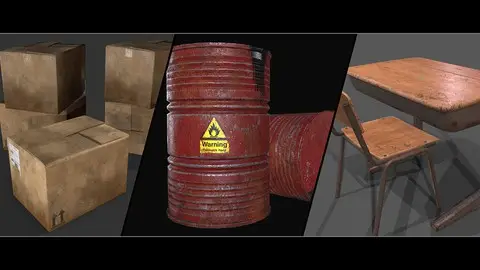
Creating 3D game assets is the main focus of this course.In chapter 1 You can sit back and listen to the introduction to understand the mechanics behind the 3D pipeline.In chapter 2 You will apply everything you have learned in chapter 1. While creating the barrel you will learn simple but effective modeling techniques in blender. In Substance painter you will be able to create realistic looking materials with ease.In chapter 3 We go deeper into the creation of the model. creating more challenging shapes so your models will look more realistic and creating materials from scratch. This way you can start thinking about materials in a different light and start looking for ways to create textures and materials you never had thought about before.Chapter 4+5 Are made for each-other. With the creation of the chair, you will get an understanding about shapes and recreating more intricate models. Now that our chair model is done you will learn how to reuse certain parts of the model so we safe loads of time and create a ''set'' of models that look good together.FREE UPDATE!!!chapter 6+7 and chapter Extra's are new updates just for you!Chapter 6+7 Are designed to speed up your process and create multiple 3D models from the same kind with a different look.Chapter Extra's Covers topics that will heighten your production speed and quality, but are better served separate so you can find them back.
Overview
Lecture 1 1.1 Introduction
Lecture 2 1.2 Search for reference images
Lecture 3 1.3 Main shapes
Lecture 4 1.4 Highpoly and lowpoly explanation
Lecture 5 1.5 UV unwrapping
Lecture 6 1.6 Texture maps
Lecture 7 1.7 Baking
Lecture 8 1.8 Import into game engine
Section 1: barrel
Lecture 9 2.1 Barrel: Reference images
Lecture 10 2.2 Barrel: Blockout
Lecture 11 2.3 Barrel: Blockout lid
Lecture 12 2.4 Barrel: Highpoly
Lecture 13 2.5 Barrel: Lowpoly
Lecture 14 2.6 Barrel: UV Unwrapping
Lecture 15 2.7 Barrel: Baking
Lecture 16 2.8 Barrel: Materials
Lecture 17 2.9 Barrel: Unity
Section 2: Cardboard box
Lecture 18 3.1 Cardboard box: Introduction
Lecture 19 3.2 Cardboard box: Modelling
Lecture 20 3.3 Cardboard box: Modelling part 2
Lecture 21 3.4 Cardboard box: Lowpoly
Lecture 22 3.5 Cardboard box: UV unwrap
Lecture 23 3.6 Cardboard box: Baking
Lecture 24 3.7 Cardboard box: Base color
Lecture 25 3.8 Cardboard box: Roughness
Lecture 26 3.9 Cardboard box: Corrugated stripes
Lecture 27 3.10 Cardboard box: Dirt
Lecture 28 3.11 Cardboard box: Watermarks
Lecture 29 3.12 Cardboard box: Decals
Lecture 30 3.13 Cardboard box: Height detail
Lecture 31 3.14 Cardboard box: Cardboard side
Lecture 32 3.15 Cardboard box: Unity
Section 3: Chair
Lecture 33 4.1 Chair: Introduction
Lecture 34 4.2 Chair: Shapes
Lecture 35 4.3 Chair: Blockout frame
Lecture 36 4.4 Chair: Wood backplate
Lecture 37 4.5 Chair: Wood seat
Lecture 38 4.6 Chair: Finish frame
Lecture 39 4.7 Chair: Lowpoly
Lecture 40 4.8 Chair: UV unwrap
Lecture 41 4.9 Chair: Baking
Lecture 42 4.10 Chair: Fixing model
Lecture 43 4.11 Chair: Materials
Section 4: Desk
Lecture 44 5.1 Desk: Blockout
Lecture 45 5.2 Desk: Highpoly
Lecture 46 5.3 Desk: Highpoly part 2
Lecture 47 5.4 Desk: Lowpoly
Lecture 48 5.5 Desk: Lowpoly part 2
Lecture 49 5.6 Desk: UV unwrapping
Lecture 50 5.7 Desk: Materials
Section 5: Concrete barrier
Lecture 51 6.1 Concrete barrier: Important notes
Lecture 52 6.2 Concrete barrier: Introduction
Lecture 53 6.3 Concrete barrier: Blockout
Lecture 54 6.4 Concrete barrier: Boolean
Lecture 55 6.5 Concrete barrier: Sculpt ready
Lecture 56 6.6 Concrete barrier: : Materialize
Lecture 57 6.7 Concrete barrier: Sculpting
Lecture 58 6.8 Concrete barrier: Lowpoly
Lecture 59 6.9 Concrete barrier: UV unwrap
Lecture 60 6.10 Concrete barrier: Rebars
Lecture 61 6.11 Concrete barrier: Finish highpoly
Lecture 62 6.12 Concrete barrier: Baking
Lecture 63 6.13 Concrete barrier: Materials
Lecture 64 6.14 Concrete barrier: Materials part2
Section 6: Damaged Concrete barrier
Lecture 65 7.1 Damaged concrete barrier: Sculpt+frame
Lecture 66 7.2 Damaged concrete barrier: Highpoly rebar part2
Lecture 67 7.3 Damaged concrete barrier: Highpoly broken rebars
Lecture 68 7.4 Damaged concrete barrier: Lowpoly rebars
Lecture 69 7.5 Damaged concrete barrier: Lowpoly
Lecture 70 7.6 Damaged concrete barrier: UV+Export
Lecture 71 7.7 Damaged concrete barrier: Baking
Lecture 72 7.8 Damaged concrete barrier: Materials
Section 7: Extra's
Lecture 73 Create your own decals
Lecture 74 Create a weld brush
Anyone who wants to learn how to use Blender,Students that have a basic understanding of 3D,Students that are willing to learn