

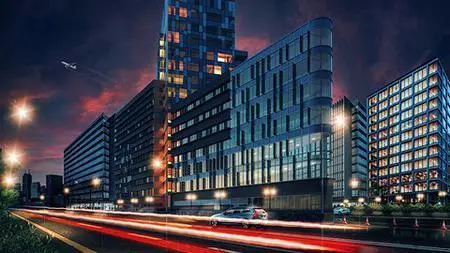
Architectural Post-Production In Photoshop(Zero To Advanced)

Architectural Post-Production In Photoshop(Zero To Advanced)
Last updated 2/2022
MP4 | Video: h264, 1280x720 | Audio: AAC, 44.1 KHz
Language: English | Size: 15.29 GB | Duration: 12h 42m
Last updated 2/2022
MP4 | Video: h264, 1280x720 | Audio: AAC, 44.1 KHz
Language: English | Size: 15.29 GB | Duration: 12h 42m
Fully step by step guide to learn post-production of architectural visualization from very basic level to advanced level
What you'll learn
General workflow of post-production.
Basic fundamentals of post-processing AKA post-production.
How to use Adobe Photoshop to achieve a good presentation result.
How to use different render paths of your render elements.
Photo compositing & photo manipulation.
How to use mask, smart objects, adjustment layers to achieve the best result without any destructive method.
Create different versions of single render shots like day & night and different weather.
Using & creating brushes for creating clouds, grass, lighting effects, etc.
Improve render details & quality.
Prepare files for printing and web publishing.
And many useful tips & tricks in Adobe Photoshop.
Requirements
A Computer & Adobe Photoshop.
Basic understanding of computer graphics.
Basic knowledge of computer and adobe photoshop, however I explain every tool and command step by step with all descriptions without skipping.
Description
Generally, you will learn the workflow of different post-processing types for architectural visualization.Also, you will learn: General pipelines of post-production Basic fundamentals of post-processing AKA post-production How to use Adobe Photoshop to achieve a good presentation result How to use different render paths of your render elements Photo combination & photo manipulation How to use masks, smart objects, adjustment layers to achieve the best result without any destructive method. Create different versions of single render shots like day&night and different weather. Using & creating brushes for creating clouds, grass, lighting effects, etc. Improve render details & quality. Prepare files for print and web publishing. And many useful tips & tricks in Adobe Photoshop.What is a requirement to path this course? For sure you need a decent performance computer, adobe photoshop. Basic knowledge of computer and adobe photoshop. Basic understanding of computer graphics.I use Adobe Photoshop 2021 which I recommend, but you could follow this tutorial with older versions of photoshop too.Also, I recommend having a computer with a minimum of 4GB of RAM.Generally, to process the post-production in 3D architectural visualization you could work on 3 modes.a. You have a whole render scene and you need to improve your lights, scene, and a few simple retouches.b. You have your building render shot and you would add environment and other assets into that render shot.c. You just have raw building geometry or concept and you want to present that as a 3D visualized scene.Also, there are several reasons to do post-production or post-process your renders.1- First you may don’t have enough hardware or software resources to achieve the final result quality you need.2- Making an environment or assets or some effects you need takes too much time or high investment required for that.3- You don’t have enough skill to create your elements and visual effects or so in 3D software.* Updated some features in photoshop 2022 latest version such as Neural Filters and new masking in Camera Raw FilterFor any reason I mentioned or any type of post-production you need to create in photoshop, there is no worry, in this series of tutorials I will cover them all and show you the process step by step.
Overview
Section 1: Introduction
Lecture 1 Update #1 Trailer
Lecture 2 Update #1 - Introduction
Lecture 3 Update #2 Introduction
Lecture 4 Introduction - Why using Post production?
Lecture 5 CGI Description
Lecture 6 Analyzing Project
Lecture 7 Open & Save Project
Lecture 8 Fix Camera Angle with Camera Raw Filter
Lecture 9 Fix Camera Angle with Free Transform (Manually)
Lecture 10 Fix Burnt Flattened Surfaces with Camera Raw Filter
Lecture 11 Fix Flattened Burnt Surfaces Manually
Lecture 12 Sky Replacement Automatically
Lecture 13 Sky Replacement Manually
Lecture 14 Sky Reflection on Water pool
Lecture 15 Overall Color Adjustment
Lecture 16 Detail Enhancement & Camera effects
Lecture 17 Prepare file to Publishing (Print & Web)
Section 2: Chapter 2 (Make Rainy scene)
Lecture 18 Introduction, Preparing Project File
Lecture 19 Adding Alpha, Sky Replacement and Overall Lighting Adjustment
Lecture 20 Add Sky Reflection In Windows
Lecture 21 Add Birds & Branch
Lecture 22 Add Raindrop - Method 1
Lecture 23 Add Raindrop - Method 2
Lecture 24 Add Floor Reflection
Lecture 25 Adding Mist effect
Lecture 26 Adding Trees to background
Lecture 27 Adding Grass
Lecture 28 Adding People
Lecture 29 Overall Adjustments
Lecture 30 Final Adjustments (End Chapter #2)
Section 3: Chapter 3 (After Rain)
Lecture 31 Introduction & Adjusting Part 1
Lecture 32 Adjusting Grass light & color
Lecture 33 Adjusting Sky & Vegetations
Lecture 34 Adding Godray
Lecture 35 Background_ Tree lines
Lecture 36 Adding Birds
Lecture 37 Final Adjustments & Publishing
Section 4: Chapter 4 (Make whole Environment)
Lecture 38 Introduction - Vanishing Point
Lecture 39 Sky Replacement
Lecture 40 Add Buildings
Lecture 41 Add Street Asphalt
Lecture 42 Add Road Blocks
Lecture 43 Add Grass
Lecture 44 Add Vegetation
Lecture 45 Finishing Road Asphalt
Lecture 46 Add Bushes
Lecture 47 Street Light - Part 1
Lecture 48 Street Light - Part 2
Lecture 49 Add Cars
Lecture 50 Fix Windows Transparency
Lecture 51 Buildings Readjustment
Lecture 52 Add Traffic Cone
Lecture 53 Interior Ceiling Lights
Lecture 54 Add Interior
Lecture 55 Cleanup Buildings
Lecture 56 Add Airplane
Lecture 57 Buildings Reflection
Lecture 58 Cars & Traffic Cones Reflection
Lecture 59 Street Lights & Bushes Reflection
Lecture 60 Migrate to new Document
Lecture 61 Lights Lens flare
Lecture 62 Car Light
Lecture 63 Add Light Trails
Lecture 64 Finalize the Project
Section 5: Chapter 5 - Advanced Tips & Tricks)
Lecture 65 Perspective Warp
Lecture 66 Vanishing Point - Advanced
Lecture 67 Smart Objects
Lecture 68 Content Aware Fill
Lecture 69 Hue Saturation - Tips
Lecture 70 Puppet Warp
Lecture 71 Quick Switch Mode Tricks
Lecture 72 Perspective & Shading - Basic Introduction
Section 6: Update 2
Lecture 73 PixelSquid Plug-in Introduction
Lecture 74 Landscape Mixer - Neural Filter
Lecture 75 Color Harmonizer - Neural Filter
Lecture 76 Object Selection Tool - Selecting Subjects
Lecture 77 Sky Selection
Lecture 78 Displacement Introduction
Lecture 79 Brush & Masking adjustment in Camera Raw Filter 2022
Lecture 80 Color Balance vs Hue/Saturation
Lecture 81 Equation Introduction
Lecture 82 Lock Transparent Pixels
Lecture 83 Using Blur with new techniques - Photoshop 2022
Lecture 84 Disk Scratch & Performance for low RAM memory
Lecture 85 Troubleshooting (Filters or tools not working, some errors reason)
Architecture students (School & University).,Who looking for get job with architectural visualization post-production.,Graphic designers, Graphic generalists.,3D Artists for improve they final renders or don't have strong equipment to add everything in 3D software.