


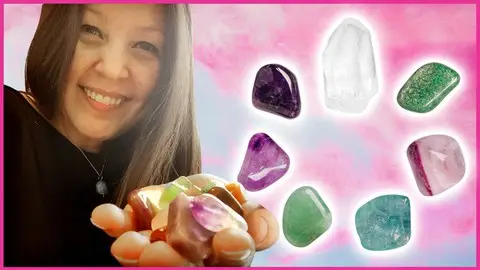
Advanced Crystal Healing Certificate Course - Energy Healing
Advanced Crystal Healing Certificate Course - Energy Healing
Last updated 12/2022
MP4 | Video: h264, 1280x720 | Audio: AAC, 44.1 KHz
Language: English | Size: 1.48 GB | Duration: 2h 15m
Last updated 12/2022
MP4 | Video: h264, 1280x720 | Audio: AAC, 44.1 KHz
Language: English | Size: 1.48 GB | Duration: 2h 15m
Expand Your Healing Crystal Knowledge and Level Up Your Abilities | Accredited Certificate Course
What you'll learn
Obtain an accredited Advanced Crystal Healer Certificate
Which crystals and grids heal all your Physical Body Systems
Use crystals and grids for Grounding, Manifesting, Space Clearing and more
Which crystals and grids aid common Emotional Body System energies
The best crystals and grids to use for the Spiritual Body System energies
Melissa's Advanced Crystal Healing steps
The intricacies and complexities of crystals
Greater detail about crystal healing colour, intensity, shape and inclusions
Recap of the 7 Main body Chakra and Higher Chakra crystals
A deeper understanding of how our mind, body and souls all work in unison
Requirements
Qualification Prerequisite: You must hold an existing basic Crystal Healer/Crystal Healing certification
Have a thorough understanding basic Crystal Healing (including cleansing)
Have at least moderate knowledge of energy healing
Have a thorough understanding of the 7 Main Chakras
Have access to the internet
Be able to watch & listen to video tutorials online
Be able to download and view PDF files
Be able to download and listen to MP3 files
Description
= A FEW OF MELISSA'S TESTIMONIALS =I love Melissa and this class! - JulianaGreat content, and her energy is amazing, almost like she is channeling a light being while emoting loving energy! - RickOnce again… amazing… as all Melissa's courses. loved it - InesMelissa explains things in an easy and engaging manner. I have taken several of her classes and have loved every one of them! Thank you, Melissa! - Lori====== WHAT TO EXPECT ======We’ll be soaring over quite a lot of information, including the intricacies of healing crystals, including: healing colour, intensity, shapes, and meaningful inclusions in this journey together! This 'advanced' course doesn't go into great detail about basic crystal healing or Chakra knowledge. But we'll go deep into the best crystals (and grid formations) for the most common issues within the 11 Bodily Systems, the states of the Emotional Body, as well as the Spiritual Body. We'll also explore the world of crystals and Manifesting, Karma, Space Clearing, and more!To get the most out of this course, students must have (at least) moderate knowledge of energy healing and Crystal healing. As such, you are expected to easily understand the terms used when referencing energy healing, Crystals healing, the 7 main Chakras, cleansing crystals, and so on.For those ready to raise their vibrations up to the next level, you'll be excited to know that by the end of our journey together you will have a deeper knowledge of – and more abilities to – achieve your goals physically, emotionally, and spiritually!====== WHAT'S INCLUDED ======The PDF version of Melissa's Advanced Crystal Healing book (PDF)11 x Body System Grids w/Stone placement examples (PDF)And additional 11 x Grids w/Stone placement examples (PDF)Once enrolled, you'll need to download my book Advanced Crystal Healing Techniques (PDF). The book has all the details and steps you'll need, and makes a great reference point during and after the course!As you progress, you'll recap with me the intricacies and complexities of healing crystal colours, intensity, shapes, and meaningful inclusions. From there, we'll explore the 11 Body System crystals, then go over the best crystals for improving our Emotional Bodies, then discover the crystals which work best with our Spiritual Bodies. We'll even touch on supplementary systems including abundance and Space Clearing crystals!Once you've completed the entire course, gone through all the lectures and practiced when prompted, if you choose to, you'll be able to take my Advanced Crystal Healing Final Exam. Upon successful completion, you'll receive a beautiful Certificate of Completion (PDF)!The additional benefits of this course include a deeper understanding of how our mind, body and soul work in unison, the ability to select and use body-system specific stones for energy healing, as well as enhancing your special ethereal gifts! Lastly, as I continue to add more helpful information to this course over time, you'll have lifetime access to it! I hope you enjoy this exciting new journey sweet friend! #biglove
Overview
Section 1: Introduction
Lecture 1 Welcome to the course!
Lecture 2 Important course information ♥ And contacting Melissa
Lecture 3 Download your course handbook (PDF)
Section 2: Chapter 1. Energy healing fundamentals
Lecture 4 Recapping the fundamentals intro
Lecture 5 Cleansing reminder
Lecture 6 Intentions and activating refresher
Lecture 7 Placement notes
Lecture 8 Intro to my healing steps
Lecture 9 - My healing steps
Lecture 10 - My disconnection & protection steps
Lecture 11 Chakra-crystal correlations refresher intro
Lecture 12 - My Chakra-crystal correlations chart
Section 3: Chapter 2. Colour intricacies
Lecture 13 Introduction to colour intricacies
Lecture 14 Common crystal colour meanings
Lecture 15 Intensity (depth) of colour
Lecture 16 Bi-coloured stones
Lecture 17 Noticing colour changes
Section 4: Chapter 3. Clarity & inclusion details
Lecture 18 Introducing crystal clarity and inclusions
Lecture 19 Stone clarity (clearness)
Lecture 20 'Milky' stones (cloudiness)
Lecture 21 - Noticing positive changes
Lecture 22 Introducing meaningful inclusions
Lecture 23 - Inclusions: angel/angel wings, bubbles, and bursts
Lecture 24 - Inclusions: hearts and coal
Lecture 25 - Inclusions: cracks
Lecture 26 Making your inclusion meaningful
Section 5: Chapter 4. Shape particulars
Lecture 27 Crystal shape intro and facet clarification
Lecture 28 Natural versus worked crystal shapes
Lecture 29 Introducing clusters
Lecture 30 - Clusters: Abundance shape
Lecture 31 - Clusters: Barnacle (with Old Soul) shape
Lecture 32 - Shape: Heart and Cube (square)
Lecture 33 - Shape: Drusy (or druzy, or druse)
Lecture 34 - Shape: Egg-shape and tumbled (rounded)
Lecture 35 - Shape: Raw and geodes (hollow and solid)
Lecture 36 - Shape: Pyramid and twin (soul mate)
Lecture 37 - Shape: Terminated (points) - Single and double
Lecture 38 - Shape: Terminated (points) - Generator and transmitter
Lecture 39 - Shape: Terminated (points) - Wand and tabular
Section 6: Chapter 5, pt 1. Physical body intro & Integumentary system crystals
Lecture 40 Working with crystals and your body systems
Lecture 41 Integumentary system intro
Lecture 42 - Integumentary system crystal chart
Lecture 43 - Integumentary system grid
Lecture 44 - Integumentary system grid steps
Section 7: Chapter 5, pt 2. Skeletal system crystals
Lecture 45 Skeletal system intro
Lecture 46 - Skeletal system crystal chart
Lecture 47 - Skeletal system grid
Lecture 48 - Skeletal system grid steps
Section 8: Chapter 5, pt 3. Muscular system crystals
Lecture 49 Muscular system intro
Lecture 50 - Muscular system crystal chart
Lecture 51 - Muscular system grid
Lecture 52 - Muscular system grid steps
Section 9: Chapter 5, pt 4. Nervous system crystals
Lecture 53 Nervous system intro
Lecture 54 - Nervous system crystal chart
Lecture 55 - Nervous system grid
Lecture 56 - Nervous system grid steps
Section 10: Chapter 5, pt 5. Endocrine system crystals
Lecture 57 Endocrine system intro
Lecture 58 - Endocrine system crystal chart
Lecture 59 - Endocrine system grid
Lecture 60 - Endocrine system grid steps
Section 11: Chapter 5, pt 6. Cardiovascular system crystals
Lecture 61 Cardiovascular system intro
Lecture 62 - Cardiovascular system crystal chart
Lecture 63 - Cardiovascular system grid
Lecture 64 - Cardiovascular system grid steps
Lecture 65 - Cardiovascular system 'on body' grid steps
Lecture 66 - Example: Cardiovascular 'on body' grid formation
Section 12: Chapter 5, pt 7. Lymphatic system crystals
Lecture 67 Lymphatic system intro
Lecture 68 - Lymphatic system crystal chart
Lecture 69 - Lymphatic system grid
Lecture 70 - Lymphatic system grid steps
Lecture 71 - Lymphatic system 'on body' grid steps
Lecture 72 - Example: Lymphatic 'on body' grid formation
Section 13: Chapter 5, pt 8. Respiratory system crystals
Lecture 73 Respiratory system intro
Lecture 74 - Respiratory system crystal chart
Lecture 75 - Respiratory system grid
Lecture 76 - Respiratory system grid steps
Section 14: Chapter 5, pt 9. Digestive system crystals
Lecture 77 Digestive system intro
Lecture 78 - Digestive system crystal chart
Lecture 79 - Digestive system grid
Lecture 80 - Digestive system grid steps
Section 15: Chapter 5, pt 10. Renal system crystals
Lecture 81 Renal system intro
Lecture 82 - Renal system crystal chart
Lecture 83 - Renal system grid
Lecture 84 - Renal system grid steps
Section 16: Chapter 5, pt 11. Reproductive system crystals
Lecture 85 Reproductive system intro
Lecture 86 - Reproductive system crystal chart
Lecture 87 - Reproductive system grid
Lecture 88 - Reproductive system grid steps
Lecture 89 - Fertility formation on the Seed of Life grid
Lecture 90 - Fertility formation steps
Section 17: Chapter 5, pt 12. Other common issues and crystals
Lecture 91 Other common issues intro
Lecture 92 Crystals for inflammation
Lecture 93 Crystals for headaches
Lecture 94 Crystals for insomnia (can't sleep)
Section 18: Chapter 6. Emotional body and crystals
Lecture 95 Working with your emotional body and crystals
Lecture 96 Anger (dissipating): crystals and grid steps
Lecture 97 Dissipating anger 'on body' grid steps
Lecture 98 - Example: Dissipating anger 'on body' grid formation
Lecture 99 Other NEGATIVE emotions and crystals that help alleviate them
Lecture 100 Compassion (enhancing): crystals and Heart-shape grid
Lecture 101 - Compassion crystal list and Heart-shape grid steps
Lecture 102 Other POSITIVE emotions and crystals that help bolster them
Lecture 103 Relationships (improve): Harmonic connection grid
Lecture 104 - Relationship crystal lists and Harmonic connection grid steps
Lecture 105 - Metatron’s Cube grid
Lecture 106 - Metatron’s Cube grid steps
Section 19: Chapter 7. Spiritual body and crystals
Lecture 107 Evolving your spiritual body with crystals
Lecture 108 Spiritual connector (enhancing): Angel star grid
Lecture 109 - Spiritual connection crystal list and Angel star grid steps
Lecture 110 Past life grid (improving)
Lecture 111 - Past lives and karma crystal lists and grid steps
Lecture 112 Other crystals that help enhance spiritual healing and gifts
Section 20: Chapter 8. Supplementary systems for crystal healing
Lecture 113 More crystal healing systems intro
Lecture 114 Grounding (enhancing): crystals and grid formation
Lecture 115 - Grounding 'on body' grid formation
Lecture 116 - Example: Grounding 'on body' grid formation
Lecture 117 Amplifying and distance healing crystals
Lecture 118 Manifesting (enhancing): Star grid
Lecture 119 - Manifesting crystal list and grid steps
Lecture 120 Abundance (enhancing): Spiral grid
Lecture 121 - Abundance grid steps
Lecture 122 Space clearing crystals and grid formation
Lecture 123 - Example: Space clearing grid formation
Section 21: Chapter 9. FAQs
Lecture 124 Common crystal and grid FAQ
Lecture 125 Being prepared when working with the public
Section 22: Chapter 10. Keep sparkling!
Lecture 126 A thank you from Melissa
Lecture 127 ♥ Bonus Lecture
Crystal Healers,Chakra Healers,Reiki practitioners,Energy Healers,Other natural therapists,Those who want to level up their healing abilities