


3D Visualizer: Interior Scene With 3Ds Max Like Ikea Level
3D Visualizer: Interior Scene With 3Ds Max Like Ikea Level
Published 9/2022
MP4 | Video: h264, 1280x720 | Audio: AAC, 44.1 KHz
Language: English | Size: 6.85 GB | Duration: 7h 31m
Published 9/2022
MP4 | Video: h264, 1280x720 | Audio: AAC, 44.1 KHz
Language: English | Size: 6.85 GB | Duration: 7h 31m
BECOME AN IN-DEMAND 3D VISUALIZER AT IKEA's 3D RENDERINGS LEVEL IN 14 DAYS
What you'll learn
You will install the necessary software 3DS MAX + Corona + 3DX Hamster. You will get acquainted with the interface, functions and opportunities.
You'll learn creating interiors: build walls, set the necessary day or night light, put the furniture and décor
Thanks to the right composition, light and materials you will design a great visualization
At the end of the course you will have at least two interiors for your first portfolio
You'll get enough skills to enhance your portfolio with your works and results of your orders
You'll see that your new hobby is a great opportunity for an extra income
Requirements
PC computer (laptop or desktop)
Understand the basics of operating PC computers
Photoshop basic knowledge will be helpful, although not necessary
Description
Where This Course Will Take YouThis course has been created for students and beginners who are looking for a remote profession, as well as for experienced designers and architects. You will learn the professional workflow and tools used in the industry to achieve stunning, photorealistic results in 3d.Instant Access to:Downloadable Workflow ChecklistDownloadable Cheat Sheet For OrdersGuide: Getting Your First OrderPrivate ChatPrivate Facebook GroupPersonal Chat With AuthorA Real Project to Your Portfolio48 Video Lessons & TasksAutodesk Certification60,000 Downloadable 3D ModelsThis Course For You If You:Just Started As A 3D Visualizer And Want To Get Orders ConsistentlyTired Of Your Current Dull JobWant To Have A Consistent Flow Of High Paying CustomersStriving For Financial FreedomWant To Work When You Want And Where You Want (On The Islands, Drinking Juicy Cocktail)Want To Increase Your Revenue And ThroughputDon't Know How To Sell Your Services Without Dropping Your PriceWant To Increase The Speed Of Order FulfillmentFrequently Asked Questions:I have never opened 3ds Max, will I succeed?Intensive from scratch, we start with the installation of programs. It is mastered by 100% of students, even children from the age of 14. After the intensive, you will start learning 3D modeling from scratch and earn money in this niche without additional courses.I'm already working in 3D, will this course be useful?Yes, it will be useful. During the course, we pay great attention to the beauty of the pitch and the chips that speed up the work. Look at the level of work. If you want to reach this level, this course is for you.After finishing the course, will I be able to take my first orders in 3D?Yes, students take their first orders as soon as they finish this course. You will make 1 template interior and at least 1 unique one to assemble the first portfolio. As a bonus, you get a list of sites where to look for orders and 20 stories of our students' first order. Your skills are objectively enough to cope even with full-fledged orders from designers. The main thing is to avoid urgent, large orders at the beginning.Is it necessary to have an art education in order to earn money?Aesthetics cannot be ignored, but it is not necessary to learn this for years. This is your art education. You will get the key techniques of creating beauty and apply them immediately in practice.How long does it take to start earning with this course from scratch?The first interior on the course will take about 16 hours (for example, 4 days for 4 hours) From that moment on, students successfully cope with work for money. But if you want to consolidate your skills and strengthen your portfolio, do some more creative work (about 10 more hours). Of course, you can study at your own pace, but I sincerely advise you to take the course as intensively as you can. If you quit halfway, then it will be difficult to remember. But when you finish this intensive, the skills will remain forever.How long will I get access to the lessons?Forever.A couple of things to note:This course is taught by a practicing professional in the arch viz industry (12 years experience)Инструктор имеет средний рейтинг 4,3 по 9 доступным курсам.В курсе используются последние версии программного обеспеченияПрисоединяйтесь сейчас и получите пожизненный доступ ко всем файлам проекта и будущим обновлениямЭтот курс преподается сертифицированным специалистом Autodesk с 15-летним опытом работы в 3D.Так чего же ты ждешь? Присоединяйтесь сегодня, и вы получите немедленный пожизненный доступ ко всем моделям трасс, текстурам и т. д.
Overview
Section 1: Introduction
Lecture 1 Greeting
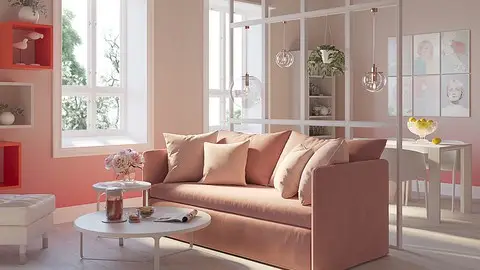
Lecture 2 Original image from the IKEA catalog - download it now
Lecture 3 Task
Section 2: Installation
Lecture 4 Installing necessary software
Lecture 5 Checking Corona
Lecture 6 Note: Compact material editor
Section 3: The basics
Lecture 7 Introduction: how to create and modify objects?
Lecture 8 Task
Lecture 9 Navigation
Lecture 10 Task
Lecture 11 Views in Viewport
Lecture 12 Select, Move, Rotate
Lecture 13 Task
Lecture 14 Initial Settings
Lecture 15 Scene Converter - a new window will appear when opening a new scene. Why?
Lecture 16 Task
Lecture 17 Hotkeys in 3Ds Max
Lecture 18 Saving and Importing
Lecture 19 Will I lose all the progress if 3Ds Max fails?
Lecture 20 Copying "Tetris"
Lecture 21 Task
Lecture 22 "Tetris" with Snaps
Lecture 23 Task
Lecture 24 Modifiers: Bend, Symmetry, TurboSmooth. Introduction to Edit poly
Lecture 25 Task
Lecture 26 Specifics of Edit poly
Lecture 27 Introduction to Edit Poly
Lecture 28 Task
Section 4: Modeling
Lecture 29 Modeling a side table
Lecture 30 Model a side-table from the graduation work on your own
Lecture 31 Task
Lecture 32 Modeling a kitchen
Lecture 33 Let’s model a kitchen!
Lecture 34 Task
Section 5: Walls
Lecture 35 Transferring a blueprint
Lecture 36 Learning lines
Lecture 37 Task
Lecture 38 Lifting the blueprint
Lecture 39 Ceiling and floor
Lecture 40 Setting the initial angle of view
Lecture 41 Corona Camera
Lecture 42 Task
Section 6: Materials/Filling
Lecture 43 Light and gray materials
Lecture 44 The window with the frightening inscription
Lecture 45 First materials from library
Lecture 46 Portals for boosting the render
Lecture 47 Task
Lecture 48 Transferring our objects
Lecture 49 !!! Turn off the conversion window forever!
Lecture 50 Materials for our objects
Lecture 51 If you don't have any toolbars in the materials editor
Lecture 52 Base materials
Lecture 53 Task
Lecture 54 Using textures in materials
Lecture 55 Download the texture of the parquet
Lecture 56 Texture color correction
Lecture 57 Specifics of using library materials
Lecture 58 Adjusting wall colors
Lecture 59 Downloading models and installing doors and windows
Lecture 60 Download all the models for this project
Lecture 61 Task
Lecture 62 Inserting base models
Lecture 63 What else can scare you?)
Section 7: Compositions
Lecture 64 Adjusting the prefect viewing angle
Lecture 65 Adjusting the prefect viewing angle - video tutorial
Lecture 66 How to set the angle on the first try
Lecture 67 Check the homework yourself on the Checklist
Lecture 68 Task
Section 8: Light
Lecture 69 Preparing materials for lighting
Lecture 70 Attention!
Lecture 71 Task
Lecture 72 Adjusting beautiful lighting
Lecture 73 The adjust the lighting and light shade sample
Lecture 74 Self-assessment checklist
Lecture 75 Task
Section 9: Grinding
Lecture 76 Postprocessing in frame buffer
Lecture 77 Postproduction settings are refined.
Lecture 78 Task
Lecture 79 Inserting all the décor and models
Lecture 80 What else can trouble you?)
Lecture 81 Self-assessment checklist:
Lecture 82 Task
Lecture 83 Final correction of materials
Lecture 84 Try to adjust render as close to the sample as possible.
Lecture 85 Self-assessment checklist:
Lecture 86 Task
Lecture 87 Final settings for rendering
Lecture 88 Most common mistakes:
Lecture 89 Render Setup: Corona 6
Lecture 90 Task
Section 10: Background
Lecture 91 Final postprocessing and saving render
Lecture 92 Mistakes
Lecture 93 The final render will provide a higher resolution and better picture.
Lecture 94 Saving
Lecture 95 Self-assessment checklist:
Lecture 96 Task
Section 11: Post-Processing
Lecture 97 1. Inserting background & adjusting the postprocessing of the day & night render
Lecture 98 2. Setting evening lighting (make street light fade)
Lecture 99 3. Setting evening background in Photoshop
Lecture 100 4. Adjustment in Post tab in daytime render
Lecture 101 5. Adjustment in Post tab in nighttime render
Lecture 102 ATTENTION!
Lecture 103 Materials for the lesson:
Lecture 104 Task
Section 12: Creativity
Lecture 105 Make your work unique!
Lecture 106 How to use Adobe Color?
Lecture 107 Appealing render checklist:
Lecture 108 The render sample
Lecture 109 Please note this
Lecture 110 Task
Section 13: Portfolio
Lecture 111 Additional viewing angles
Lecture 112 Some students' works
Lecture 113 Bad examples
Lecture 114 Adding some blur on the front- and background
Lecture 115 Task
Section 14: Additional Lesson #1
Lecture 116 How to get your first client?
Section 15: Additional Lessons
Lecture 117 Corona Renderer
Lecture 118 AnimaRender
Beginners who have never used 3DS MAX or any 3D software before!,People who are learning 3DS MAX now, but want to know more advanced, professional tools and workflows by improving their 3D renders like Ikea level.,Architects/Interior designers who want to learn 3D visualization.