VUE and PlantFactory 2023 R0 macOs | 4.4 Gb
Languages Supported: English, Deutsch, Français
Languages Supported: English, Deutsch, Français
The E-on development team, a business Bentley Systems, is pleased to announce the availability of VUE and PlantFactory 2023 R0 (8005859). This release adds consistent material reflection handling for standard materials across all atmosphere models and render engines and improves the core workflow experience of the Function Editor, the heart of many of VUE's advanced setups.
What's new in VUE 2023 - Date: January 11, 2023
Main features in Release 2023:
- Feature parity between Creator and Professional
- Complete Function Editor overhaul
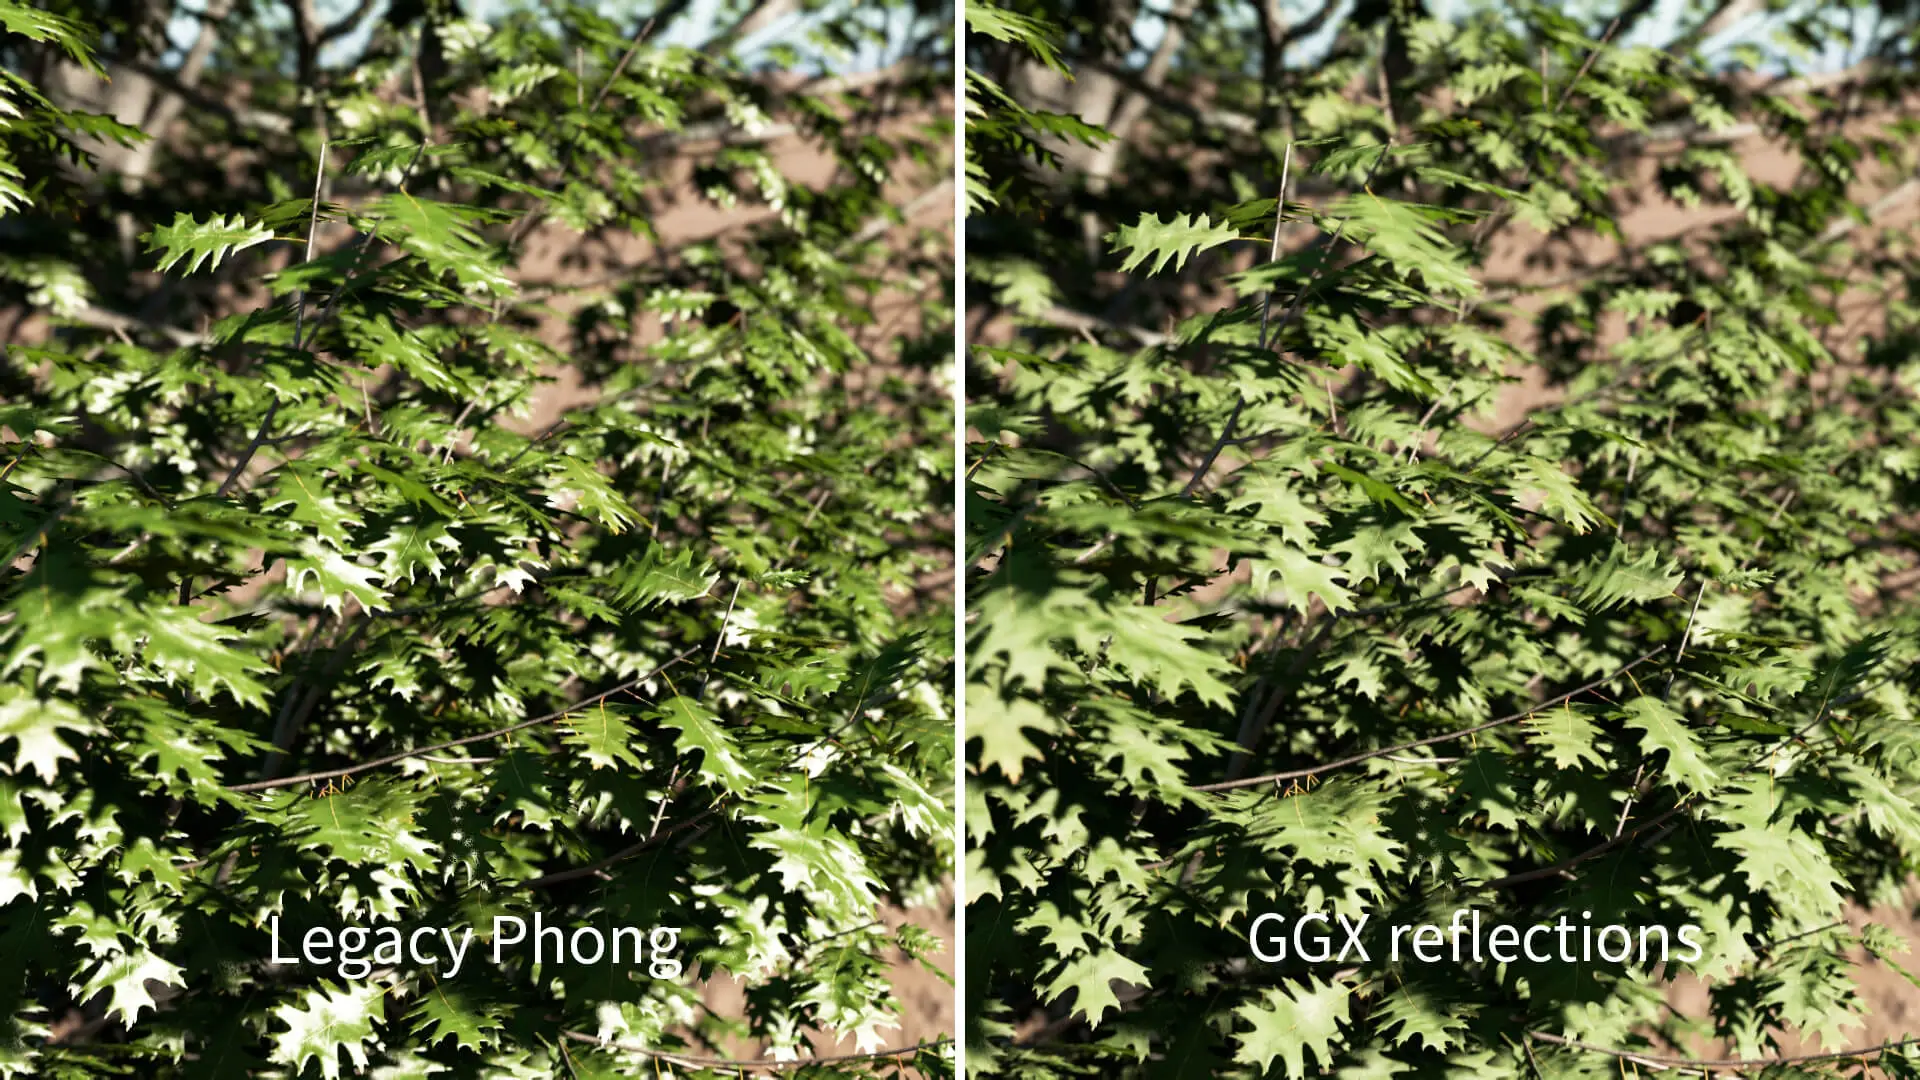
- GGX reflection model for highlights
- Redshift conversion of VUE scenes in 3DS Max
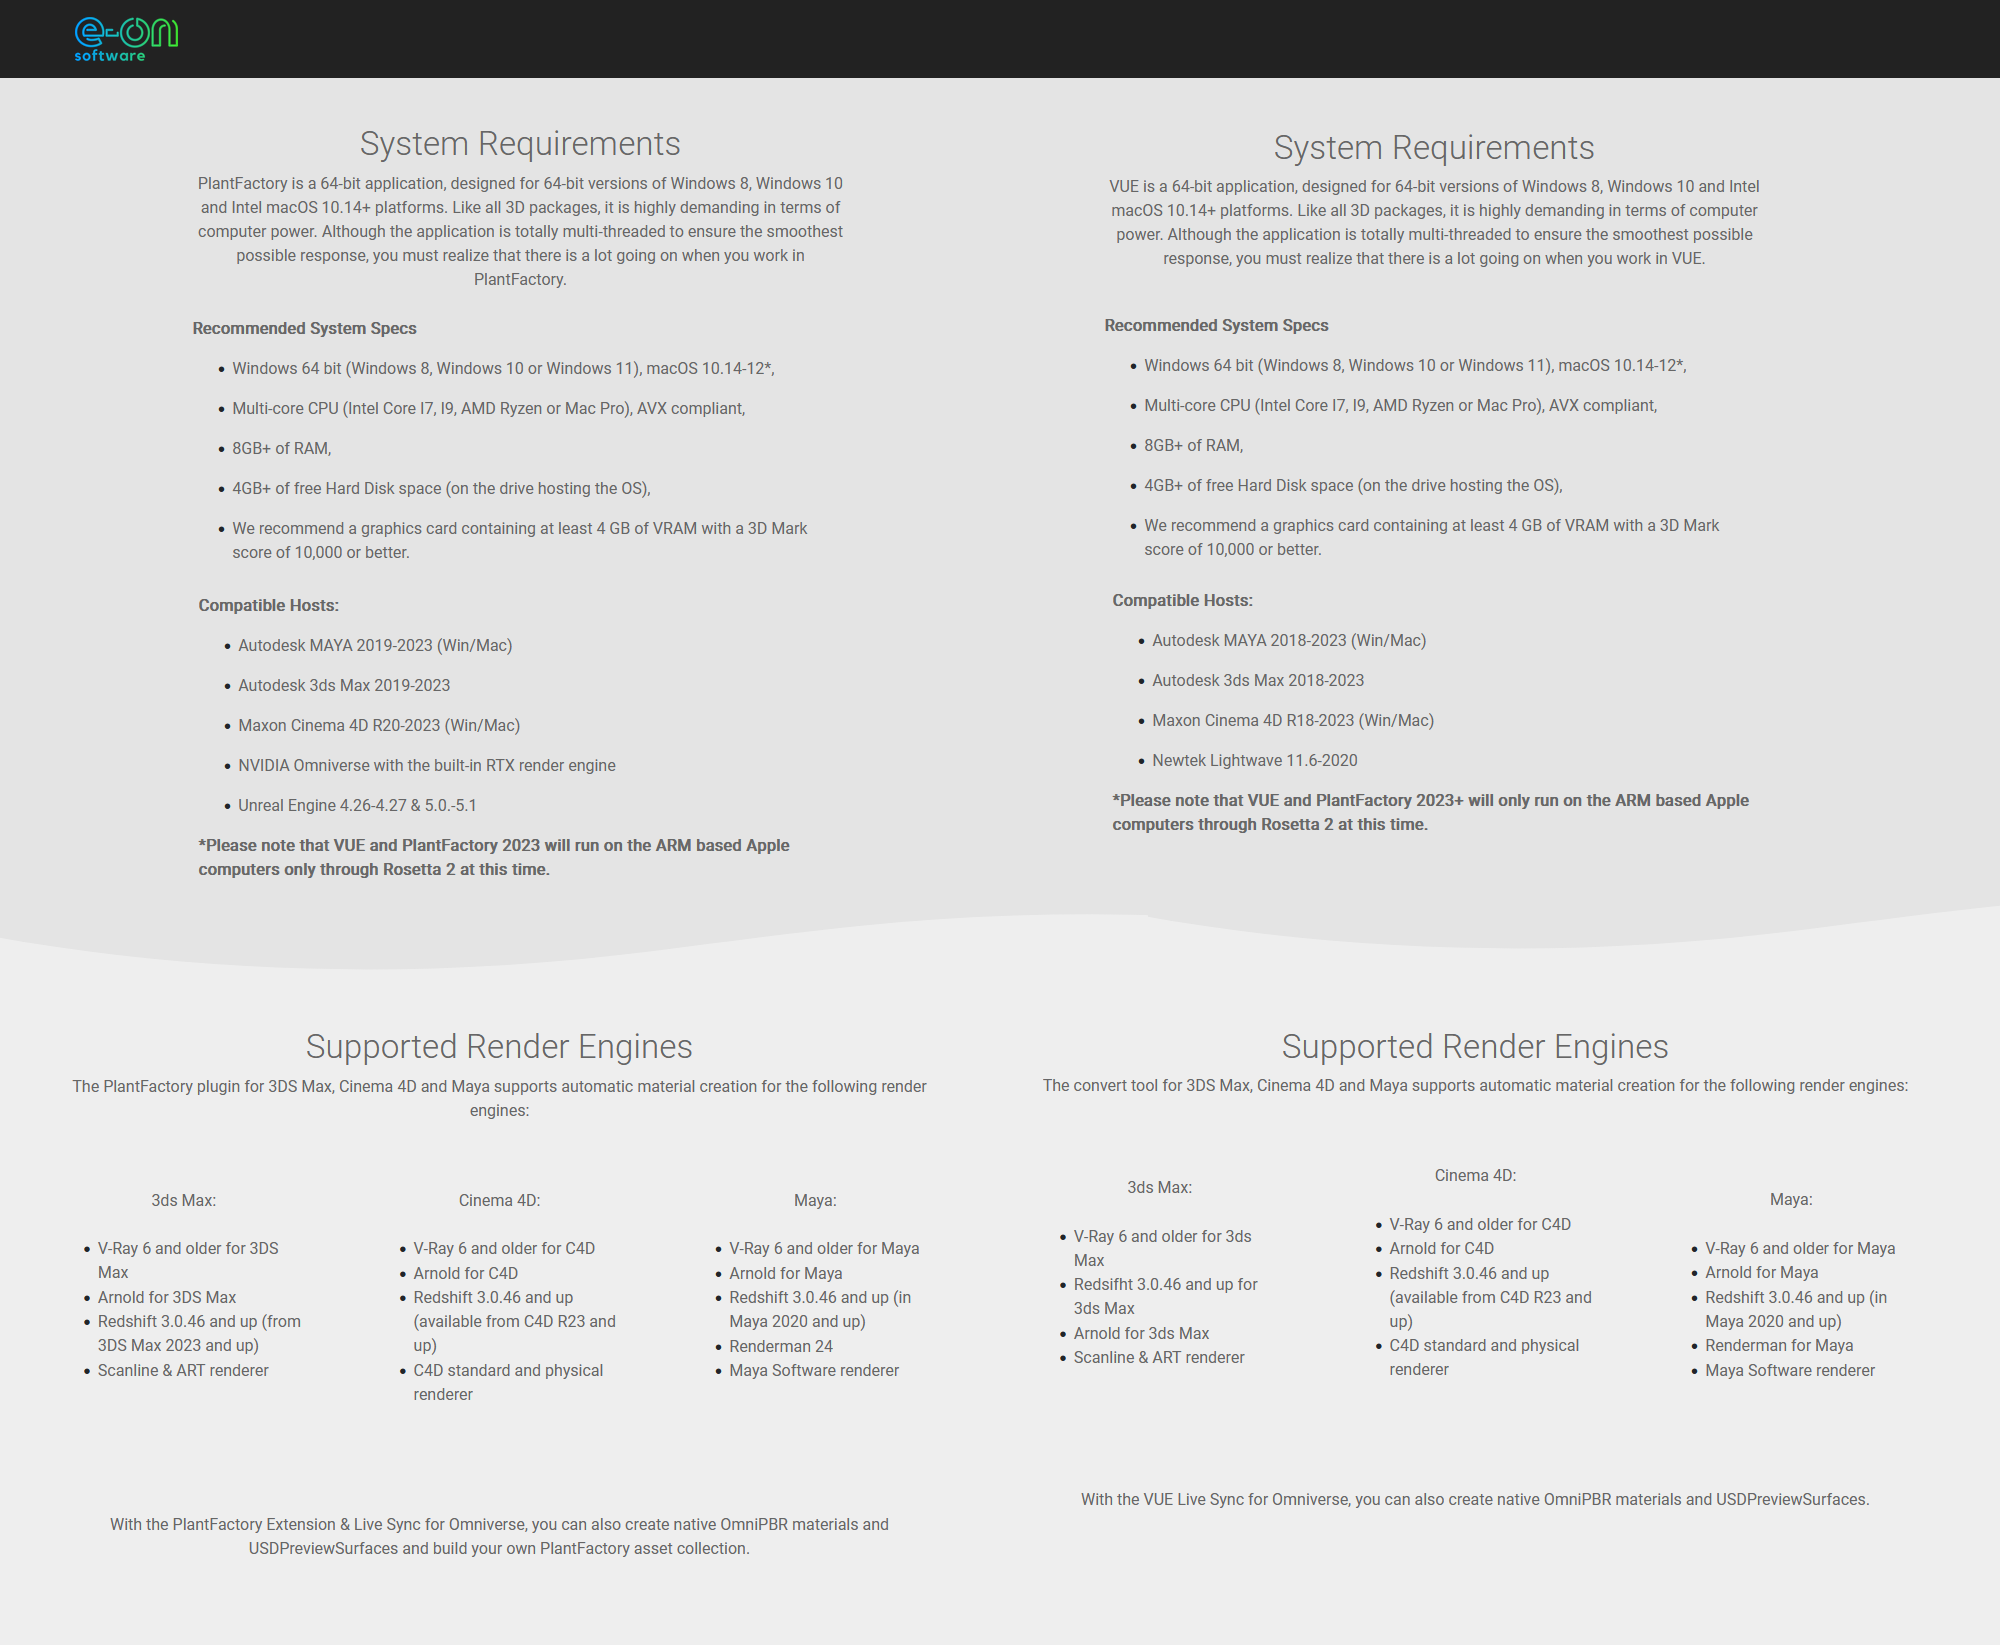
This release adds additional plugin compatibility for the following host application versions and render engines (bold items are new):
- 3D Studio Max 2016 to 2023
- Maya 2015 to 2023
- Cinema4D R20 to 2023
- Redshift material conversion (starting from 3.0.46) in Maya 2020 and above, Cinema 4D R23 and above and 3D Studio Max 2022 and above
- Support for V-Ray 6 in 3ds Max, Maya and Cinema 4D
Feature parity in Creator: full render features, export options and all integration plugins
As announced in our recent blog post, this release has a lot in store for Creator users: Creator now includes the same feature set as Professional. Except for the number of render nodes for network rendering (which is 5 for Creator), every feature from VUE Professional is now included in Creator.
As a Creator user, you now get access to
- Unlimited render size
- Multipass & G-Buffer rendering
- Complete export options, including
. Full scene export with EcoSystems
. HDRI and panoramic sky export
. Cloud export as OpenVDB
. Material baking
. Export of any type of mesh object (terrains, rocks, hyperblobs, primitives, splines, plants, EcoSystems)
- Import and export of camera data / motion tracking information
- Python console and API
- Live link to ZBrush through the GoZ bridge
- All integration plugins for 3DS Max, Maya, Cinema 4D and Lightwave with scene creation tools and conversion options for Redshift, Arnold, V-Ray and Renderman
- Live link to Nvidia Omniverse through the VUE connector and Nucleus
Please note that with this feature parity between the versions being in place, anything created with the Creator version is limited to non-commercial use only.
A completely redesigned Function Editor experience
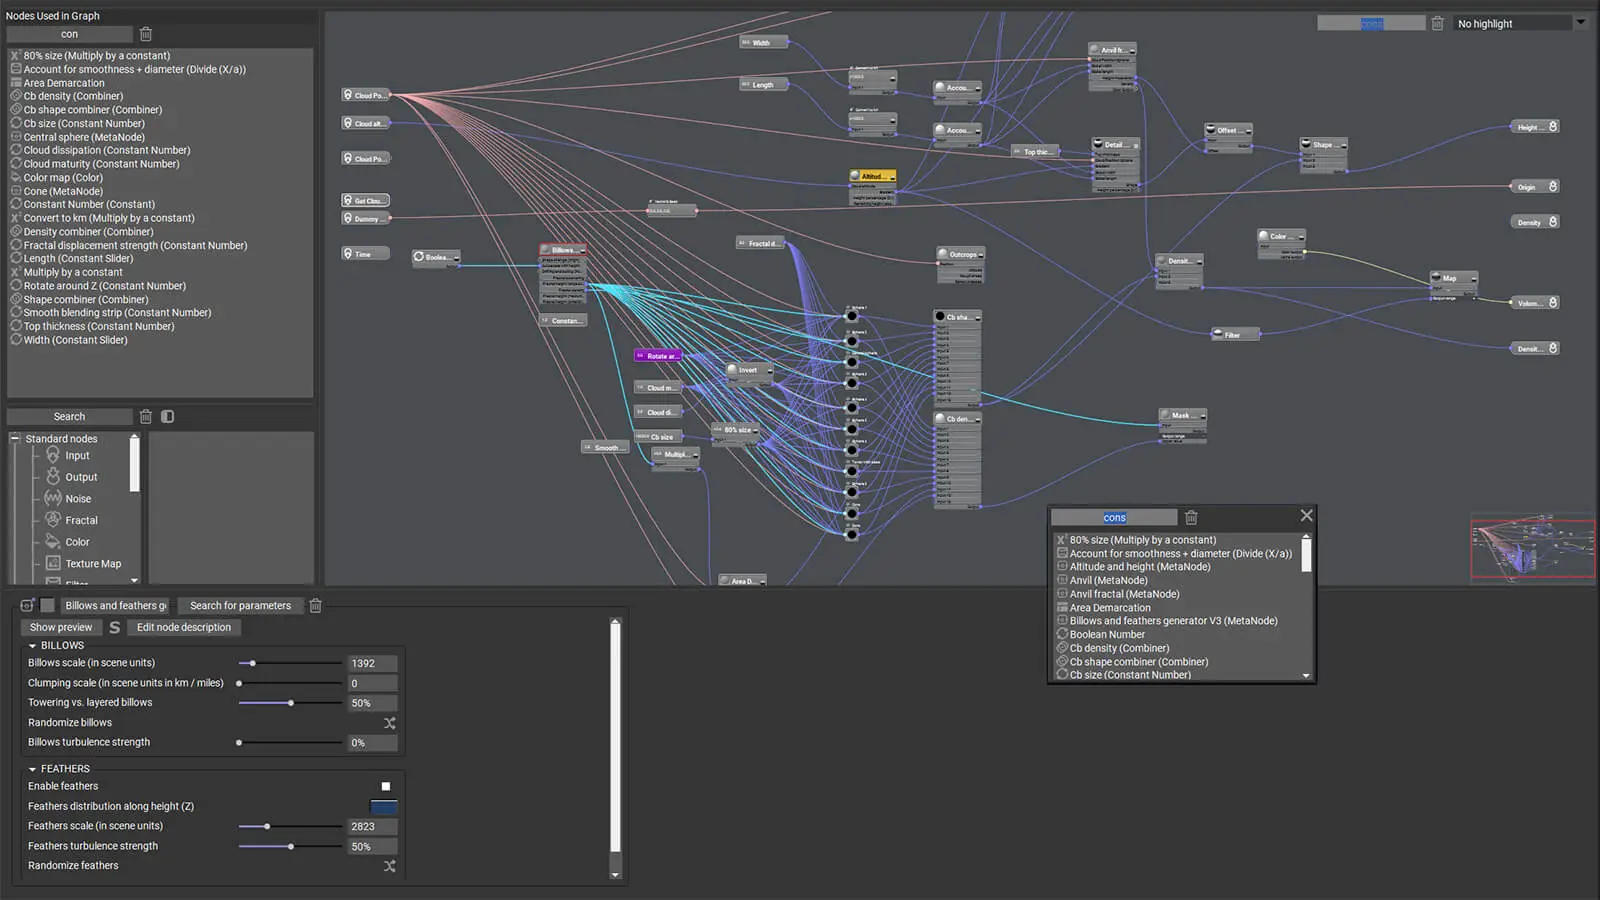
Continuing the node and graph editing improvements from the last release, we finalized the graph and node editing overhaul. Now you can work faster and more efficiently in the graph than ever before, which will speed up your daily workflow tremendously. You will certainly feel much more comfortable and at home in the revised Function Editor.
Search functionalities
- You can now search for nodes using the [TAB] key on the keyboard, by right clicking in the graph to open a context menu and typing to open the search or by clicking on any node input or output to open a list of compatible nodes for that specific port and typing to search.
- Highlight a connection, open the search with [TAB] and insert the node into the connection immediately.
- The node selector has been redesigned into a two-column layout and hosts the same search functionality as the [TAB] key.
- Each node has a search field for searching through all parameters in a node across all tabs. This is especially useful for large nodes with many parameters.
- In the top right corner of the graph, there is a search field for searching through the nodes used in the graph. The graph will frame the selected search result immediately. The same functionality is also available in the newly added "Nodes used in graph" panel.
- Also in the top right corner, you can highlight nodes of a specific type to make them stand out from the rest of the graph. The highlighting is combined with the search field for used nodes in the graph.
Streamlined connection handling
- New nodes can be connected rapidly to existing nodes by directly clicking on the inputs and outputs of a node and selecting / searching for the node to be connected or by dragging out a connection line from a port, releasing it in an empty area and selecting / searching for the node from there. When you hold [CTRL] / [CMD] while dragging out a connection line, you will be asked to select the input of the new node that you want to connect the line to, including any secondary inputs.
- You no longer need to explicitly connect a connection to a specific input or output. Just release the connection line anywhere on a node to open a context menu, letting you select the desired port.
- Hold down [SHIFT] and click on a connection line to move it from one port or node to another. This also works with multiple connection lines. Release the lines in an empty area to create a new node to which to connect the lines.
- Double-click the beginning or end of a connection to quickly delete it.
- Non-matching data types are now automatically converted when dragging a connection from a node with a different data output to a node which expects a different type of data. This behavior can be disabled at will in the Graph menu.
- Drag and drop image files directly into the graph to create a Projected Texture Map node. Dragging image files on the inputs of a node or the output of a material channel (e.g. the normal output) will automatically connect the texture to that input / output and insert data conversion nodes if required. Dragging and dropping image files works in every image widget across the application, not just in the graph.
- New options in the Graph menu can fade all disconnected nodes or remove all disconnected nodes.
- Drag a node over a connection line to auto-snap it into the connection. Release the mouse to confirm or continue dragging to unsnap the node. This behavior can be disabled at will in the Graph menu. By holding down [CTRL] while dragging a node, you can temporarily invert the behavior and e.g. enable snapping once when it is otherwise disabled and vice-versa.
Improved node handling and graph readability
- Hamburger button to fold and unfold nodes quickly. Clicking cycles through the following states: Completely folded, show only connected inputs & outputs, show all available secondary input / output groups, unfold all secondary input / output groups. You can also set the unfolding state globally for all nodes in the graph in the Graph menu.
- Any node can now be disabled which will bypass the node as if it wasn't there.
- In Material graphs, nodes can now be soloed to preview their immediate effect on the material. You can select which material channel to use for the solo preview.
- The preview shape (sphere, cube etc.) and preview scale can now be set per node through a right click on the node.
- If a node is too small to display the node name inside of the node or if a node is completely minimized, the node name will appear above the node for better node identification.
- Math operations can now be performed in all numerical fields in the application, be it a node or an editor. This includes basic arithmetic operations such as add, subtract, multiply and divide (using the operators + - * /) and formulas such as sin, cos, tan etc.
Introducing GGX reflections for standard materials
You've probably experienced this problem in the past: You switch to a Photometric atmosphere and suddenly, the highlights of all standard materials are too bright and the scene looks overexposed. This happened because photometric atmospheres use real-world sun and light intensities which are several thousand times stronger than in other atmosphere models. Standard materials used an exponential phong model for highlight reflections which then produced overly strong highlights.
This is no longer a problem, because in the new 2023 release, you can switch the highlight model type in standard from phong to the much better GGX model. Switching to GGX ensures that no matter the atmosphere model and light intensity, highlights will always look the same and you no longer need to tweak materials to adjust over- or underexposed highlights.
Selecting the highlight model is a render setting and instructs the render engine to use the corresponding model. Please note that the path tracer always enforces GGX, even if phong is selected. The raytracer supports both phong and GGX to maintain backwards compatibility. PBR materials are not affected by this change, because they have always been using GGX internally and looked consistent across all render engines and atmosphere models.
Please be aware that anisotropic highlights are currently only supported in the phong model.
Convert VUE scenes to Redshift scenes in 3DS Max
We extended the Redshift conversion introduced in the last release to 3DS Max. With the VUE integration plugin, single assets or entire scenes can be converted to Redshift assets with pre-setup Redshift materials. This feature requires at least Redshift 3.0.46 (or any higher version) with the new OCIO workflow. Set the render engine to Redshift in 3DS Max and then load the VUE scene with the integration plugin. Select all objects you would like to convert in the World Browser, right click on them and select the conversion option. Alpha maps can either be linked to Redshift's opacity channel or they can be loaded into the Redshift sprite node for best rendering performance.
Further improvements & features
- Improved Filter Editor with correct extrapolation of the curve outside of the filter's boundaries. There's also a new option (not available in all filter curves, but context-sensitively where it makes sense) for clipping the output of the filter to a defined range.
- New math nodes for spherical projection, distance between two points and angle between two vectors; improvement of existing nodes such as rotation & twist
- New Wetness index node for driving material distributions on terrains and for fast simulation of erosion shapes in terrain graphs
- Proper sRGB color space handling for colored texture maps; in previous versions, the sRGB color space was only estimated by setting a gamma value of 2.2 for texture maps that represent colors. Now, color textures are truely converted to sRGB color space. Upon loading scenes created with previous versions, the application will ask you if you want to convert all color textures with a gamma of 2.2 into sRGB or not.
- "Apply additional bump" on the displacement tab in the Material Editor applies the displacement function or texture used as an additional bump layer to the material. This is independent from the actual bump and normal channels in the material and can be activated as a third option.
- Bump mapping can be inverted on the backside of a face (e.g. on leaves), just like normal mapping. A new checkbox on the bump tab of the Material Editor enables or disables this behavior.
- Baked procedural textures are now computed with increased baking precision and with optional texture anti-aliasing for smoother color transitions.
- Two-sided materials can now be converted with the VUE plugin for Cinema 4D standard / physical renderers. Previously, the backside conversion was not supported.
- Support for backlight / translucency conversion with Arnold in all applications.
- Clouds can be exported as NanoVDB.
- Cloud changes are now synced with the Omniverse stage.
- The cloud position input in the Function Editor can now optionally take altitude and height modulation influences into account.
- New options in the cloud position input nodes allow switching between local and world coordinates without causing a scale difference of 2000 as before (the old behavior is still available as legacy mode for backwards compatibility).
- Clearcoat index of refraction is now supported in Substance Materials.
- Substantial speed-up of the 3D display computation of the Terrain Editor.
- New quality boost slider for displaced infinite water planes to avoid excessive memory usage.
…and much more.
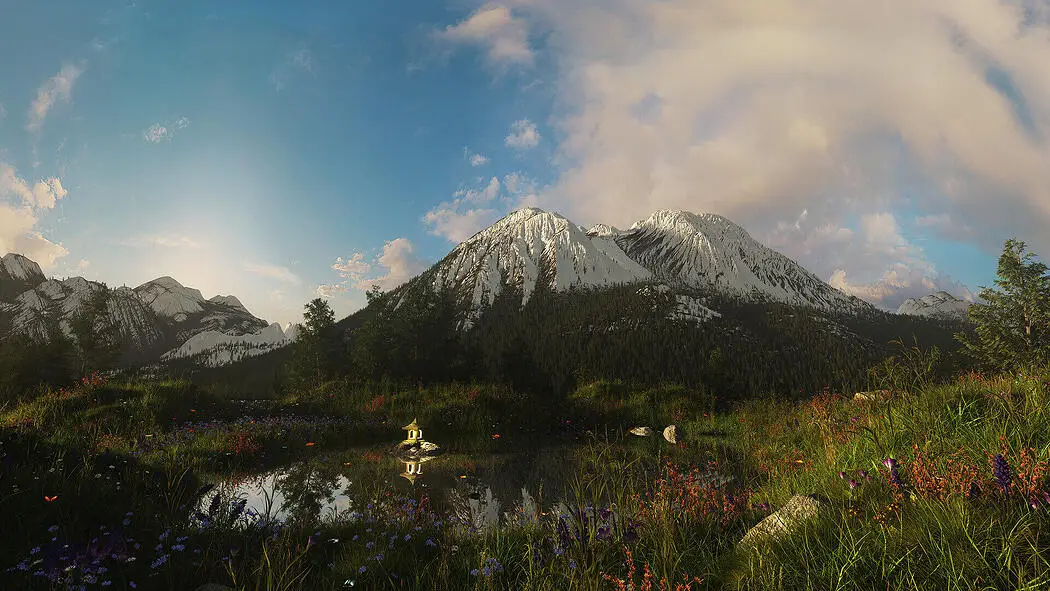
VUE is the only environment package on the market that includes everything you need for creating beautiful CG environments. From skies and volumetric clouds to terrains, large-scale EcoSystems, wind-swept vegetation, open water bodies, roads and rocks: everything is right there for you to use out of the box. VUE ships with a hefty plant library, comprised of over 170 plant species, from HD vegetation to low resolution. The VUE vegetation technology ensures that no two plants you add to your scene will be identical, freeing you from hardcore vegetation modeling tasks, and adding more subtlety to your scenes. The Plant Editor lets you easily customize any of the plants included and allows you to create your own, unique plant species. VUE will also automatically animate plants for you so that they gently sway in the breeze, or twist and bend in strong winds. VUE is natively compatible with the fully procedural PlantFactory file format, to produce high-quality hero trees as well as distant vegetation. VUE can animate all of the exposed plant properties (such as Health, Seasonality or any other published plant parameter).
Creating Arnold and V-Ray materials in Maya with the PlantFactory plugin
E-on software is the leading developer of solutions for the creation, animation, rendering and integration of natural 3D environments. We were founded in 1997 on the premise that powerful graphics tools should never get in the way of the designer’s creativity. After being acquired by Bentley Systems in 2015, we’ve been able to invest more resources into research and development to ensure we remain at the forefront of the industry. Our products are used worldwide by the film, television, architecture, game, science, educational and entertainment industries.
Product: VUE and PlantFactory
Version: 2023 R0 (8005859) *
Supported Architectures: x64
Website Home Page : https://info.e-onsoftware.com/
Languages Supported: multilanguage
System Requirements: macOs *
Size: 4.4 Gb
EON_VUE_ENTERPRISE_V2023_MACOSX64-XFORCE
EON_VUE_ENTERPRISE_V2023_PLUGIN_ADDON_WIN64_MACOSX64-XFORCE
EON_PLANTFACTORY_ENTERPRISE_V2023_MACOSX64-XFORCE
EON_PLANTCATALOG_V2023_MACOSX64-XFORCE
EON_PLANTCATALOG_PLUGIN_ADDON_V2023_WIN64_MACOSX64-XFORCE
EON_VUE_ENTERPRISE_V2023_PLUGIN_ADDON_WIN64_MACOSX64-XFORCE
EON_PLANTFACTORY_ENTERPRISE_V2023_MACOSX64-XFORCE
EON_PLANTCATALOG_V2023_MACOSX64-XFORCE
EON_PLANTCATALOG_PLUGIN_ADDON_V2023_WIN64_MACOSX64-XFORCE
Please visit my blog
Added by 3% of the overall size of the archive of information for the restoration
No mirrors please
Added by 3% of the overall size of the archive of information for the restoration
No mirrors please


