Autodesk VRED Pro 2024.0 with Assets

Autodesk VRED Pro 2024.0 with Assets | 11.3 Gb
Autodesk Inc. is pleased to announce the availability of VRED Products 2024.0 is an visualization software enables automotive designers and engineers to create product presentations, design reviews, and virtual prototypes with highly realistic materials, physical camera settings, engineering tools, and even surface analysis modes.
2024 Highlights and General Improvements
Autodesk VRED Pro 2024.0 with Assets
Click below for further information on new features and improvements found in 2024.
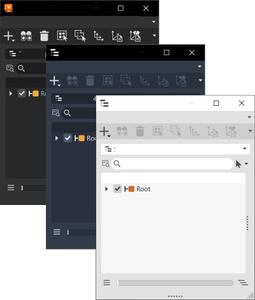
In VRED 2024, we started to modernize and rework the complete user interface. The change also aligns better to the Alias UI. It all starts with a new onboarding screen, where you have access to different topics, like learning paths, documentation, what’s new, and so on. When you are in VRED, the first thing that jumps out at you, is the new icon set, which is modernized and optimized for better readability. But it’s not just the icons that have changed. All module windows and the main window have been optimized. And you will see our new blue accent color throughout. And if you want to dock a window onto the main UI, you can do that now with the middle mouse button or with Shift+LMB, and preselect where it should be docked, which will avoid docking by mistake. You can also very easily create groups now. And if you want to add a window to the Quick Access bar, you can do that now with a right click on the top border. You will also recognize that the tabs of the windows are now on the top, as well as the toolbars of each window. And within the windows, you will see our new infinite sliders, where you can easily change values by hovering over the number area. Another change is with our View Cube. Now, you see a navigation bar appearing containing multiple options, when hovering over it, like different navigation options, and Turntable. You also can change the View Cube’s position size and appearance and hide the view cube and the navigation bar with a keyboard shortcut. And if you want to have a different color theme, you can do that now, as well. We have 3 different color themes: a dark blue, a light grey, and the dark grey. For changing layouts, different workflows or personas, we now have a new workspace rollout, where you can save your previously used layouts and quickly switch between them, directly in the main user interface.
The new VRED user experience was a huge undertaking and can be seen throughout the software. Icons, tree layouts, and icon bars have been redesigned, new docking functionality and color themes have been implemented, along with updates to the View Cube design and functionality.
Color Themes
You can now change the color theme used in VRED. Choose from dark grey, dark blue, and light.
![Autodesk VRED Pro 2024.0 with Assets]()
In the Window menu, select Color Themes and choose a theme color. Since VRED uses colors throughout the UI to help to indicate states or to differentiate one field from another, these will vary slightly from one theme to the next.
Button/Checkbox/Field Coloring
In modules, button, checkbox, and field coloring indicates changes to indicate its state.
- When active, these are framed or underlined pale blue.

![Autodesk VRED Pro 2024.0 with Assets]()
- When hovered, these are framed or underlined pale blue.

![Autodesk VRED Pro 2024.0 with Assets]()
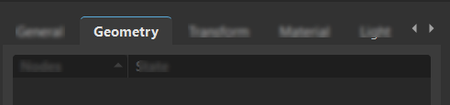
Tab Coloring
When a tab is selected, a blue line appears above it, indicating it's active.
![Autodesk VRED Pro 2024.0 with Assets]()
Toolbar Icon Coloring
Toolbar icon coloring indicates changes to indicate its state.

![Autodesk VRED Pro 2024.0 with Assets]()
- When active, icons are gold and underlined blue.
- When inactive, icons are white.
- When hovered, icons are underlined pale blue.
Multi-field Coloring
Options with multiple fields use color to differentiate one field from another.
- For fields with XYZ values, X fields have a red line, Y have a green, and Z have a blue.

![Autodesk VRED Pro 2024.0 with Assets]()
- For fields with UV values, U fields have a red line and V have a green.

![Autodesk VRED Pro 2024.0 with Assets]()
Tree Coloring
The coloring in the various tree views can indicate the state, hierarchy, or even whether something is a clone.
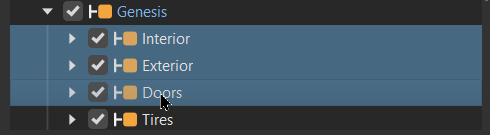
- When tree items are selected, these are highlighted blue.

![Autodesk VRED Pro 2024.0 with Assets]()
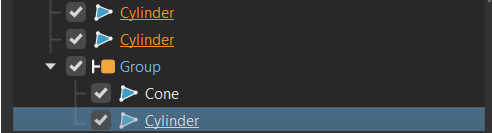
- When tree items are cloned, the selected clone is underlined and white and others are underlined and orange.
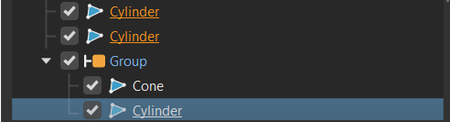
![Autodesk VRED Pro 2024.0 with Assets]()
Icon and Icon Bar Redesign
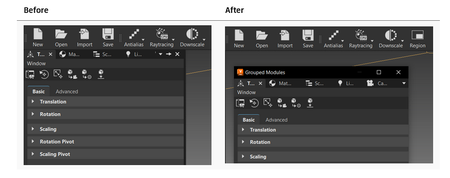
The Icon Bar in all modules and editors has been moved to below the Menu Bar.
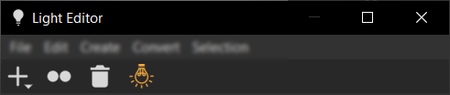
![Autodesk VRED Pro 2024.0 with Assets]()
Tree Layout Redesign
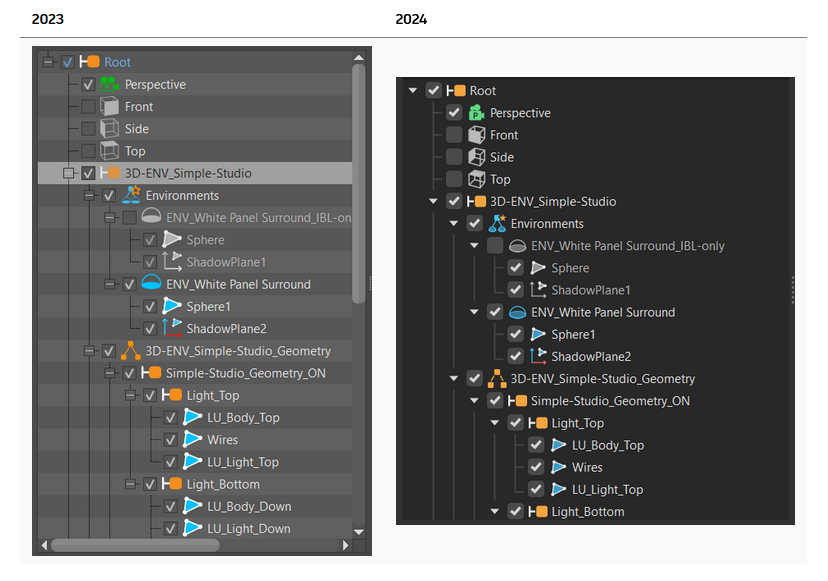
In the Scenegraph, you will notice the tree has been refreshed, making it easier to read and displaying more content in less space to reduce scrolling.
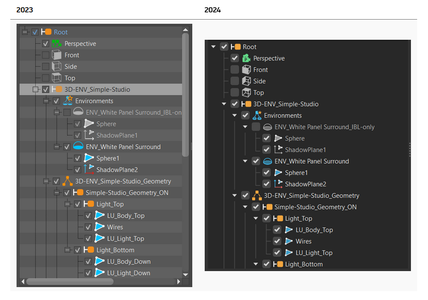
![Autodesk VRED Pro 2024.0 with Assets]()
The new VRED user experience was a huge undertaking and can be seen throughout the software. Icons, tree layouts, and icon bars have been redesigned, new docking functionality and color themes have been implemented, along with updates to the View Cube design and functionality.
Color Themes
You can now change the color theme used in VRED. Choose from dark grey, dark blue, and light.
Autodesk VRED Pro 2024.0 with Assets

In the Window menu, select Color Themes and choose a theme color. Since VRED uses colors throughout the UI to help to indicate states or to differentiate one field from another, these will vary slightly from one theme to the next.
Button/Checkbox/Field Coloring
In modules, button, checkbox, and field coloring indicates changes to indicate its state.
- When active, these are framed or underlined pale blue.
Autodesk VRED Pro 2024.0 with Assets

- When hovered, these are framed or underlined pale blue.
Autodesk VRED Pro 2024.0 with Assets

Tab Coloring
When a tab is selected, a blue line appears above it, indicating it's active.
Autodesk VRED Pro 2024.0 with Assets

Toolbar Icon Coloring
Toolbar icon coloring indicates changes to indicate its state.
Autodesk VRED Pro 2024.0 with Assets

- When active, icons are gold and underlined blue.
- When inactive, icons are white.
- When hovered, icons are underlined pale blue.
Multi-field Coloring
Options with multiple fields use color to differentiate one field from another.
- For fields with XYZ values, X fields have a red line, Y have a green, and Z have a blue.
Autodesk VRED Pro 2024.0 with Assets

- For fields with UV values, U fields have a red line and V have a green.
Autodesk VRED Pro 2024.0 with Assets

Tree Coloring
The coloring in the various tree views can indicate the state, hierarchy, or even whether something is a clone.
- When tree items are selected, these are highlighted blue.
Autodesk VRED Pro 2024.0 with Assets
- When tree items are cloned, the selected clone is underlined and white and others are underlined and orange.
Autodesk VRED Pro 2024.0 with Assets
Icon and Icon Bar Redesign
The Icon Bar in all modules and editors has been moved to below the Menu Bar.
Autodesk VRED Pro 2024.0 with Assets

Tree Layout Redesign
In the Scenegraph, you will notice the tree has been refreshed, making it easier to read and displaying more content in less space to reduce scrolling.
Autodesk VRED Pro 2024.0 with Assets
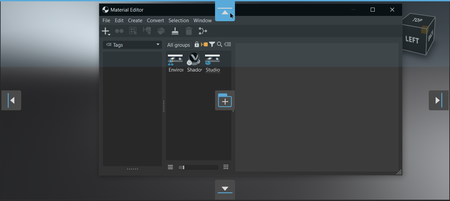
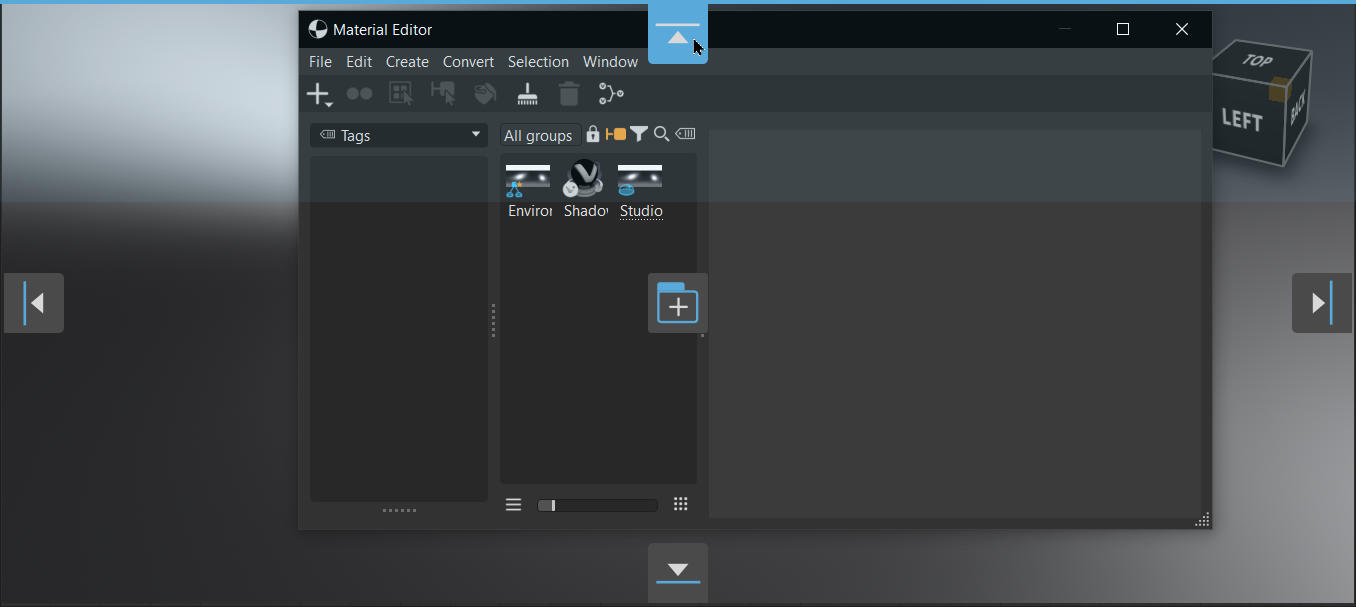
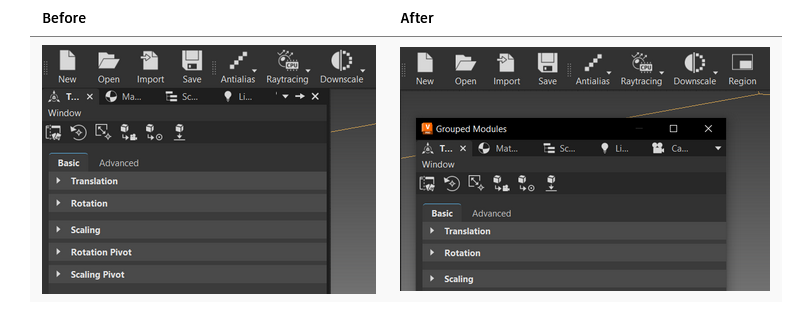
We've introduced a new docking behavior, which is the same as what is used in Alias. When docking a floating window, icons appear as you near the UI, which are used to indicate where the window will be docked. The window automatically resizes to the length of the docked side. Modules can be docked as a stacked or tabbed group.
How to Dock to the UI
1. Do either of the following:
- Press the MMB and drag a module toward any edge of the UI.
- Press and hold the Shift key as you LMB-drag a module toward any edge of the UI.
Blue icons appear, one for each side of the app and another in the middle (Dock Grouped Modules) for grouping modules together.

![Autodesk VRED Pro 2024.0 with Assets]()
2. Hover over an icon until highlighted, then release your mouse button to dock the module to that side of the UI.
![Autodesk VRED Pro 2024.0 with Assets]()
Docking Modules Together
Modules can be docked together in two ways: stacked or tabbed.
- To dock modules as a stacked group, press and hold the Shift key, as you LMB-drag the module over the side icon where the other module is docked, then release your mouse.
![Autodesk VRED Pro 2024.0 with Assets]()
- To dock modules into a tabbed group, press and hold the Shift key, as you LMB-drag the module over Dock Grouped Modules, then release your mouse. A tab is created and added to the end of the group.
![Autodesk VRED Pro 2024.0 with Assets]()

![Autodesk VRED Pro 2024.0 with Assets]()
Undocking Modules
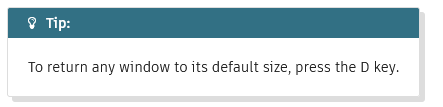
When a module is undocked, it returns to its original size and shape. When VRED is minimized, undocked context menus are also minimized.
![Autodesk VRED Pro 2024.0 with Assets]()
Here are a few ways to undock a module:
- To detach a module from a tabbed group, right-click a module's tab and select Detach.
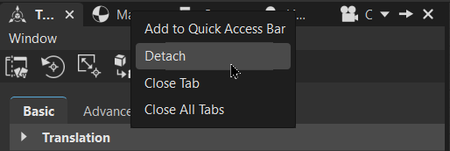
![Autodesk VRED Pro 2024.0 with Assets]()
- To detach a tabbed group of modules, click.
![Autodesk VRED Pro 2024.0 with Assets]()
To detach a module from a stacked group, click.
![Autodesk VRED Pro 2024.0 with Assets]()
Python For Docking
We added the function, setAllowedAreas, to the QVRDockWidgetWrapper to disable docking globally, if Disable Docking is set in the MainWindow preference.
How to Dock to the UI
1. Do either of the following:
- Press the MMB and drag a module toward any edge of the UI.
- Press and hold the Shift key as you LMB-drag a module toward any edge of the UI.
Blue icons appear, one for each side of the app and another in the middle (Dock Grouped Modules) for grouping modules together.
Autodesk VRED Pro 2024.0 with Assets

2. Hover over an icon until highlighted, then release your mouse button to dock the module to that side of the UI.
Autodesk VRED Pro 2024.0 with Assets
Docking Modules Together
Modules can be docked together in two ways: stacked or tabbed.
- To dock modules as a stacked group, press and hold the Shift key, as you LMB-drag the module over the side icon where the other module is docked, then release your mouse.
Autodesk VRED Pro 2024.0 with Assets
- To dock modules into a tabbed group, press and hold the Shift key, as you LMB-drag the module over Dock Grouped Modules, then release your mouse. A tab is created and added to the end of the group.
Autodesk VRED Pro 2024.0 with Assets
Autodesk VRED Pro 2024.0 with Assets

Undocking Modules
When a module is undocked, it returns to its original size and shape. When VRED is minimized, undocked context menus are also minimized.
Autodesk VRED Pro 2024.0 with Assets

Here are a few ways to undock a module:
- To detach a module from a tabbed group, right-click a module's tab and select Detach.
Autodesk VRED Pro 2024.0 with Assets

- To detach a tabbed group of modules, click.
Autodesk VRED Pro 2024.0 with Assets
To detach a module from a stacked group, click.
Autodesk VRED Pro 2024.0 with Assets
Python For Docking
We added the function, setAllowedAreas, to the QVRDockWidgetWrapper to disable docking globally, if Disable Docking is set in the MainWindow preference.
Save, edit, and export workspace configurations, as well as access specifically created configurations for rendering, animation, presentation, and review workspaces.
What is a workspace?
When you group modules into one window, this can be saved as a workspace.
In the upper right corner, click the Workspace field to access its menu containing the following options:
- Save - Saves the current workspace, if it has changed. This option is greyed out when the workspace is unchanged.
- Save As - Saves the current workpace, enabling you to name it.
- Edit - Enables the renaming or deleting of workspaces listed in the Edit Workspaces dialog. Select a workspace, right-click and choose either Edit for renaming or Delete for removing a workspace, then click OK to save the changes.
- Export Selected - Exports the current window configuration to share with others. Select a workspace from the Workspace menu, select Export Selected, enter a file name in the Export current workspace, then click Save. Now, this file can be attached and shared.
- Default - Resets the workspace to the default window configuration.
- Data Preparation - Opens a workspace specifically created for data preparation workflows.
- Animation - Opens a workspace specifically created for animation workflows.
- Rendering - Opens a workspace specifically created for rendering workflows.
- Review - Opens a workspace specifically created for review workflows.
- Presentation - Opens a workspace specifically created for presentation workflows.
The VRED View Cube has been redesigned to have the same look and feel of the Alias one. We have combined it with the Navigation Bar for easy access to frequently used tools.
As your mouse nears the View Cube, the following features appear:
![Autodesk VRED Pro 2024.0 with Assets]()
Home
Click Home to switch back to the ICV (the default view).
View Cube Options
Click Gear to access a menu containing the following options:
- Show View Cube (Alt + V) - When checked, the View Cube is displayed when near, and hidden when unchecked.
- Show Naviation Bar (Alt + N) - When checked, the Navigation Bar is displayed when near, and hidden when unchecked.
- Set Current View (ICV) - Changes the default view of the internal camera view to that of the current view.
- Options - Opens the View Cube Options, where you can change the position and/or size of the View Cube, as well as its opacity when a distance away.
Navigation Bar
The Navigation Bar appears as you get closer to the View Cube. It contains camera-related features for changing the view of your scene. If not all tools are visible, expand the length of your screen to display the complete set. For information on each tool, see About the View Cube.
New View Cube Preferences
Show, hide, and change the position, size, and opacity of the View Cube with the new preferences found in the Navigation Help section of the Render Options Preferences.
1. Select Edit > Preferences > Render Options.
2. In the Navigation Help section, select any of these options:
- Show View Cube - Displays the View Cube when enabled. To hide it, disable this option.
- View Cube Position - Sets the location of the View Cube and Navigation Bar. Choose from Top Right, Top Left, Bottom Right, or Bottom Left.
- View Cube Size - Sets the size of the View Cube. Choose from Tiny, Small, Normal, the default, or Large.
- Opacity - Sets how pronounced the View Cube is when your cursor is away from it. At 1.00, the View Cube is always at full opacity, regardless of your cursor's location. At 0, the View Cube is only visible when near to it. Use this during demonstrations to reduce visual clutter.
As your mouse nears the View Cube, the following features appear:
Autodesk VRED Pro 2024.0 with Assets
Home
Click Home to switch back to the ICV (the default view).
View Cube Options
Click Gear to access a menu containing the following options:
- Show View Cube (Alt + V) - When checked, the View Cube is displayed when near, and hidden when unchecked.
- Show Naviation Bar (Alt + N) - When checked, the Navigation Bar is displayed when near, and hidden when unchecked.
- Set Current View (ICV) - Changes the default view of the internal camera view to that of the current view.
- Options - Opens the View Cube Options, where you can change the position and/or size of the View Cube, as well as its opacity when a distance away.
Navigation Bar
The Navigation Bar appears as you get closer to the View Cube. It contains camera-related features for changing the view of your scene. If not all tools are visible, expand the length of your screen to display the complete set. For information on each tool, see About the View Cube.
New View Cube Preferences
Show, hide, and change the position, size, and opacity of the View Cube with the new preferences found in the Navigation Help section of the Render Options Preferences.
1. Select Edit > Preferences > Render Options.
2. In the Navigation Help section, select any of these options:
- Show View Cube - Displays the View Cube when enabled. To hide it, disable this option.
- View Cube Position - Sets the location of the View Cube and Navigation Bar. Choose from Top Right, Top Left, Bottom Right, or Bottom Left.
- View Cube Size - Sets the size of the View Cube. Choose from Tiny, Small, Normal, the default, or Large.
- Opacity - Sets how pronounced the View Cube is when your cursor is away from it. At 1.00, the View Cube is always at full opacity, regardless of your cursor's location. At 0, the View Cube is only visible when near to it. Use this during demonstrations to reduce visual clutter.
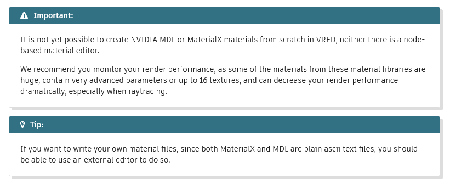
It is now possible to import NVIDIA MDL and MaterialX materials, adjust exposed parameters in the Material Editor, and render in all three render modes (OpenGL, CPU raytracing, and GPU raytracing). We have also changed the material roughness control to a perceptually linear behavior with a 0 - 1 range for easier control.
In VRED 2024, we started to modernize and rework the complete user interface. Additionally, we added the ability to import Material x and MDL materials. This will give you a ton of more options when working with materials, as they can capture complex material definitions, as they can be procedural, but are an open standard that have been used by many applications out there for better exchangability within and beyond Autodesk.
You may want to download MDL materials from the Nvidia website and Material X from the AMD website for example. Then simply create a Material X or MDL material and then load the material definitions. Now, you will see all editable parameters available. This can improve massively your pipeline when working with materials.
Example Material Libraries
Click the links below to access the following material libraries:
- NVIDIA vMaterials Library - A collection of realistic real-world materials described in the NVIDIA Material Definition Language (MDL) designed and verified by NVIDIA Material Specialists for accuracy, control, and consistency.
- AMD GPUOpen MaterialX Library - A downloadable library of ready-to-use PBR materials in the open-source MaterialX format.
- Physical Based database - A database of physically based values for CG artists.
![Autodesk VRED Pro 2024.0 with Assets]()
MDL Support in OpenGL and in the Raytracers Precomputed Illumination Mode
For the Precomputed Illumination mode in the OpenGL renderer and the CPU and GPU raytracers, MDL materials are processed to a simplified model, due to real time constraints. This simplified model is based on a roughness/metalness PBR model with some modifications. The MDL material gets simplified to the general metal, specular, and diffuse layers modeled with an anisotropic/isotropic GGX BRDF. On top of those layers, there is the clearcoat layer modeled with an isotropic GGX BRDF. Specular transmission is modeled using the absorption_coefficient and scattering_coefficients as combined coefficients for the Beer-Lambert Law, without changing the IOR in between boundaries (no refraction or internal reflections) for OpenGL and fully taking into account the IOR between boundaries in the raytracer's Precomputed Illumination mode. Diffuse transmission in OpenGL is approximated by a simplified diffuse lit approximation of subsurface scattering. Transparency is implemented as alpha blending. Emissions don't light the scene.
Note that the process of simplifying an MDL material produces a material as close to the original, based on the OpenGL renderer and CPU/GPU raytracer's precomputed Illumination mode constraints. In this process, some features of the MDL will be removed or switched to a simpler forms.
Unsupported Features
These features are not supported in the OpenGL renderer and CPU/GPU raytracers Precomputed mode:
- The bidirectional distribution functions: measured_bsdf.
- All emissive distribution functions.
- All the hair bidirectional scattering distribution functions.
- The distribution function modifiers and combiners: measured_curve_layer, thin_film, directional_factor, and measured_curve_factor.
- Resources: light profile files and BSDF measurement data files.
- The geometric property displacement.
These features are not supported in only the OpenGL renderer:
- All volume distribution functions.
Partially Supported Features
These features are partially supported in the OpenGL renderer and CPU/GPU raytracers Precomputed mode:
- Supported BSDFs will be approximated as best as possible with microfacet_ggx_vcavities_bsdf and diffuse_reflection_bsdf.
- Supported distribution function modifiers and combiners will be used to combine the metal, specular, diffuse, transmissive, and clearcoat layers.
Material Roughness
We have also changed the material roughness control to a perceptually linear behavior with a 0 - 1 range for easier control. This enables VRED to map roughness values from other material libraries. When opening existing scenes, the material appearance will not be changed; however, the value are adjusted to the new 0 - 1 range.
Converting Old Roughness to New
For those who have old materials that need to be converted to this new roughness scale, you can do this either manually or with Python.
Manual Approach
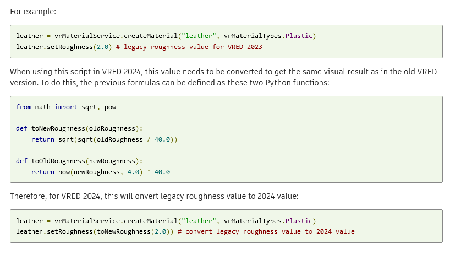
Use a calculator for new conversion values. For example, if you used a VRED roughness value of 2.0 for certain material types, such as leather, you will need to calculate the value for use in the 2024 version.

![Autodesk VRED Pro 2024.0 with Assets]()
Use these formula to convert an old roughness value to the new and vice versa.
- From old to new - To get the new value, divide the old roughness value by 40.0, then take the square root of the result twice.
newRoughness = sqrt(sqrt(oldRoughness / 40.0))
- From new to old - To get the old value, multiply the new roughness value by itself four times, and multiply that by 40.0.
oldRoughness = (newRoughness^4) * 40.0
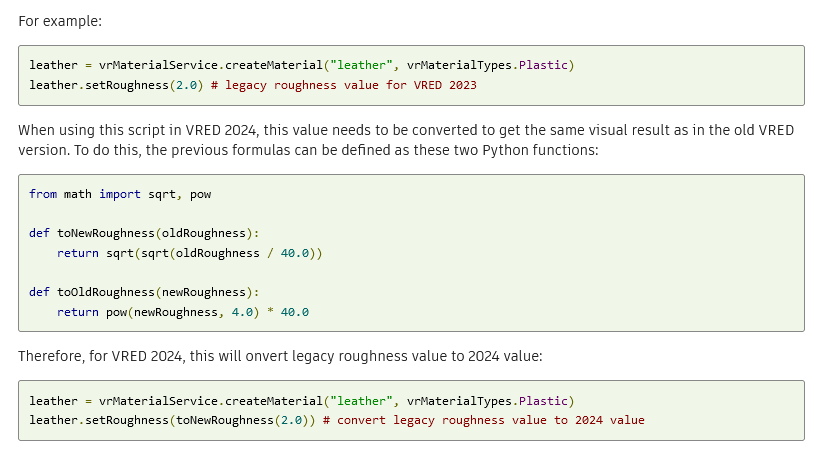
Python Approach
Material roughness can be set with a Python script. VRED 2024 expects the values to use the new range (0 - 1). VRED 2023 and older expect the values use the old range (0 - 40).
Therefore, a script written for an older VRED version (2023.4 and below) might set a specific roughness value.
![Autodesk VRED Pro 2024.0 with Assets]()
In VRED 2024, we started to modernize and rework the complete user interface. Additionally, we added the ability to import Material x and MDL materials. This will give you a ton of more options when working with materials, as they can capture complex material definitions, as they can be procedural, but are an open standard that have been used by many applications out there for better exchangability within and beyond Autodesk.
You may want to download MDL materials from the Nvidia website and Material X from the AMD website for example. Then simply create a Material X or MDL material and then load the material definitions. Now, you will see all editable parameters available. This can improve massively your pipeline when working with materials.
Example Material Libraries
Click the links below to access the following material libraries:
- NVIDIA vMaterials Library - A collection of realistic real-world materials described in the NVIDIA Material Definition Language (MDL) designed and verified by NVIDIA Material Specialists for accuracy, control, and consistency.
- AMD GPUOpen MaterialX Library - A downloadable library of ready-to-use PBR materials in the open-source MaterialX format.
- Physical Based database - A database of physically based values for CG artists.
Autodesk VRED Pro 2024.0 with Assets

MDL Support in OpenGL and in the Raytracers Precomputed Illumination Mode
For the Precomputed Illumination mode in the OpenGL renderer and the CPU and GPU raytracers, MDL materials are processed to a simplified model, due to real time constraints. This simplified model is based on a roughness/metalness PBR model with some modifications. The MDL material gets simplified to the general metal, specular, and diffuse layers modeled with an anisotropic/isotropic GGX BRDF. On top of those layers, there is the clearcoat layer modeled with an isotropic GGX BRDF. Specular transmission is modeled using the absorption_coefficient and scattering_coefficients as combined coefficients for the Beer-Lambert Law, without changing the IOR in between boundaries (no refraction or internal reflections) for OpenGL and fully taking into account the IOR between boundaries in the raytracer's Precomputed Illumination mode. Diffuse transmission in OpenGL is approximated by a simplified diffuse lit approximation of subsurface scattering. Transparency is implemented as alpha blending. Emissions don't light the scene.
Note that the process of simplifying an MDL material produces a material as close to the original, based on the OpenGL renderer and CPU/GPU raytracer's precomputed Illumination mode constraints. In this process, some features of the MDL will be removed or switched to a simpler forms.
Unsupported Features
These features are not supported in the OpenGL renderer and CPU/GPU raytracers Precomputed mode:
- The bidirectional distribution functions: measured_bsdf.
- All emissive distribution functions.
- All the hair bidirectional scattering distribution functions.
- The distribution function modifiers and combiners: measured_curve_layer, thin_film, directional_factor, and measured_curve_factor.
- Resources: light profile files and BSDF measurement data files.
- The geometric property displacement.
These features are not supported in only the OpenGL renderer:
- All volume distribution functions.
Partially Supported Features
These features are partially supported in the OpenGL renderer and CPU/GPU raytracers Precomputed mode:
- Supported BSDFs will be approximated as best as possible with microfacet_ggx_vcavities_bsdf and diffuse_reflection_bsdf.
- Supported distribution function modifiers and combiners will be used to combine the metal, specular, diffuse, transmissive, and clearcoat layers.
Material Roughness
We have also changed the material roughness control to a perceptually linear behavior with a 0 - 1 range for easier control. This enables VRED to map roughness values from other material libraries. When opening existing scenes, the material appearance will not be changed; however, the value are adjusted to the new 0 - 1 range.
Converting Old Roughness to New
For those who have old materials that need to be converted to this new roughness scale, you can do this either manually or with Python.
Manual Approach
Use a calculator for new conversion values. For example, if you used a VRED roughness value of 2.0 for certain material types, such as leather, you will need to calculate the value for use in the 2024 version.
Autodesk VRED Pro 2024.0 with Assets

Use these formula to convert an old roughness value to the new and vice versa.
- From old to new - To get the new value, divide the old roughness value by 40.0, then take the square root of the result twice.
newRoughness = sqrt(sqrt(oldRoughness / 40.0))
- From new to old - To get the old value, multiply the new roughness value by itself four times, and multiply that by 40.0.
oldRoughness = (newRoughness^4) * 40.0
Python Approach
Material roughness can be set with a Python script. VRED 2024 expects the values to use the new range (0 - 1). VRED 2023 and older expect the values use the old range (0 - 40).
Therefore, a script written for an older VRED version (2023.4 and below) might set a specific roughness value.
Autodesk VRED Pro 2024.0 with Assets
There is an onboarding component containing a series of Getting Started and What's New videos. Each Getting Started subject (Data Preparation, Variant Sets and Switches, Materials and Environments, Lighting, Cameras, Rendering, Animation, Interactions, and Collaboration and VR) contains a Learn More button, which delivers additional video and tutorial resources for that topic.
We developed a new streaming app optimized for mobile devices, such as smartphones and tablets. It now has a vertical menu adapted to the new Autodesk UI guidelines and is now more modular and extensible. The app has been optimized in terms of programming language (React), so it is now more modular and extensible.
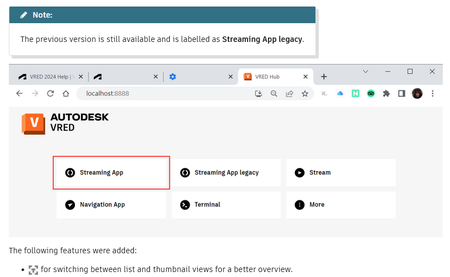
![Autodesk VRED Pro 2024.0 with Assets]()

![Autodesk VRED Pro 2024.0 with Assets]()
- An option for displaying only group content for better navigation. Click the group title to enter the group view.
![Autodesk VRED Pro 2024.0 with Assets]()
- Resizing your browser can change the group display from one to two columns.
![Autodesk VRED Pro 2024.0 with Assets]()
- Optimization of multitouch gestures for mobile devices, such as zooming and panning with two fingers.
Autodesk VRED Pro 2024.0 with Assets

Autodesk VRED Pro 2024.0 with Assets
- An option for displaying only group content for better navigation. Click the group title to enter the group view.
Autodesk VRED Pro 2024.0 with Assets
- Resizing your browser can change the group display from one to two columns.
Autodesk VRED Pro 2024.0 with Assets
- Optimization of multitouch gestures for mobile devices, such as zooming and panning with two fingers.
To avoid the execution of Python commands that can arbitrarily call operating system commands during file load, we implemented a Python sandbox. It can be configured in Preferences > Script. By default, the sandbox is enabled, blocking the following operations:
- Creating new network connections in Python scripts
- File system access through Python IO modules
- Starting new processes
If a Python script contained in a project file tries to process one of these operations, a warning dialog is displayed. The operation can then manually be allowed or blocked.
If Apply this action to all future instances is selected, it applies the selected action to all subsequent occurrences of the same command.
Selecting the action, Allow for this project, allows the operation until a new scene is called or another project file is loaded.
Selecting Don’t execute blocks the operation and a Python exception is thrown.
Sandbox Preferences
Use the Script preferences to enable, disable, or configure the Python sandbox.
- Enable Python Sandbox - Use to enable or disable the Python sandbox. When the sandbox is disabled, no restrictions are in place for script execution. When enabled, creating new network connections in Python scripts, providing file system access through Python IO modules, and starting new processes are blocked.
- Advanced Search - Use for configuring exceptions. When enabled, VRED will check Allowed Functions for any added functions and Allowed Modules for any added modules exceptions.
. If socket is added to the allowed list, all functions provided by the socket module are no longer blocked.
. If socket.getaddrinfo is added to the list of allowed functions, then only the function, getaddrinfo, provided by the socket module, is no longer blocked.
. The allowed modules exception can also be used to exclude custom Python modules from the Python sandbox.
Other Sandbox Controls
In addition to the preferences, the sandbox can also be controlled with command line options and an environment variable.
- Use -insecure_python to completely switch off the sandbox.
- Use -force_secure_python to force the sandbox to be switched on.
- Set the environment variable, VRED_SECURE_PYTHON, to force the sandbox to be switched on.
Autodesk VRED Pro 2024.0 with Assets
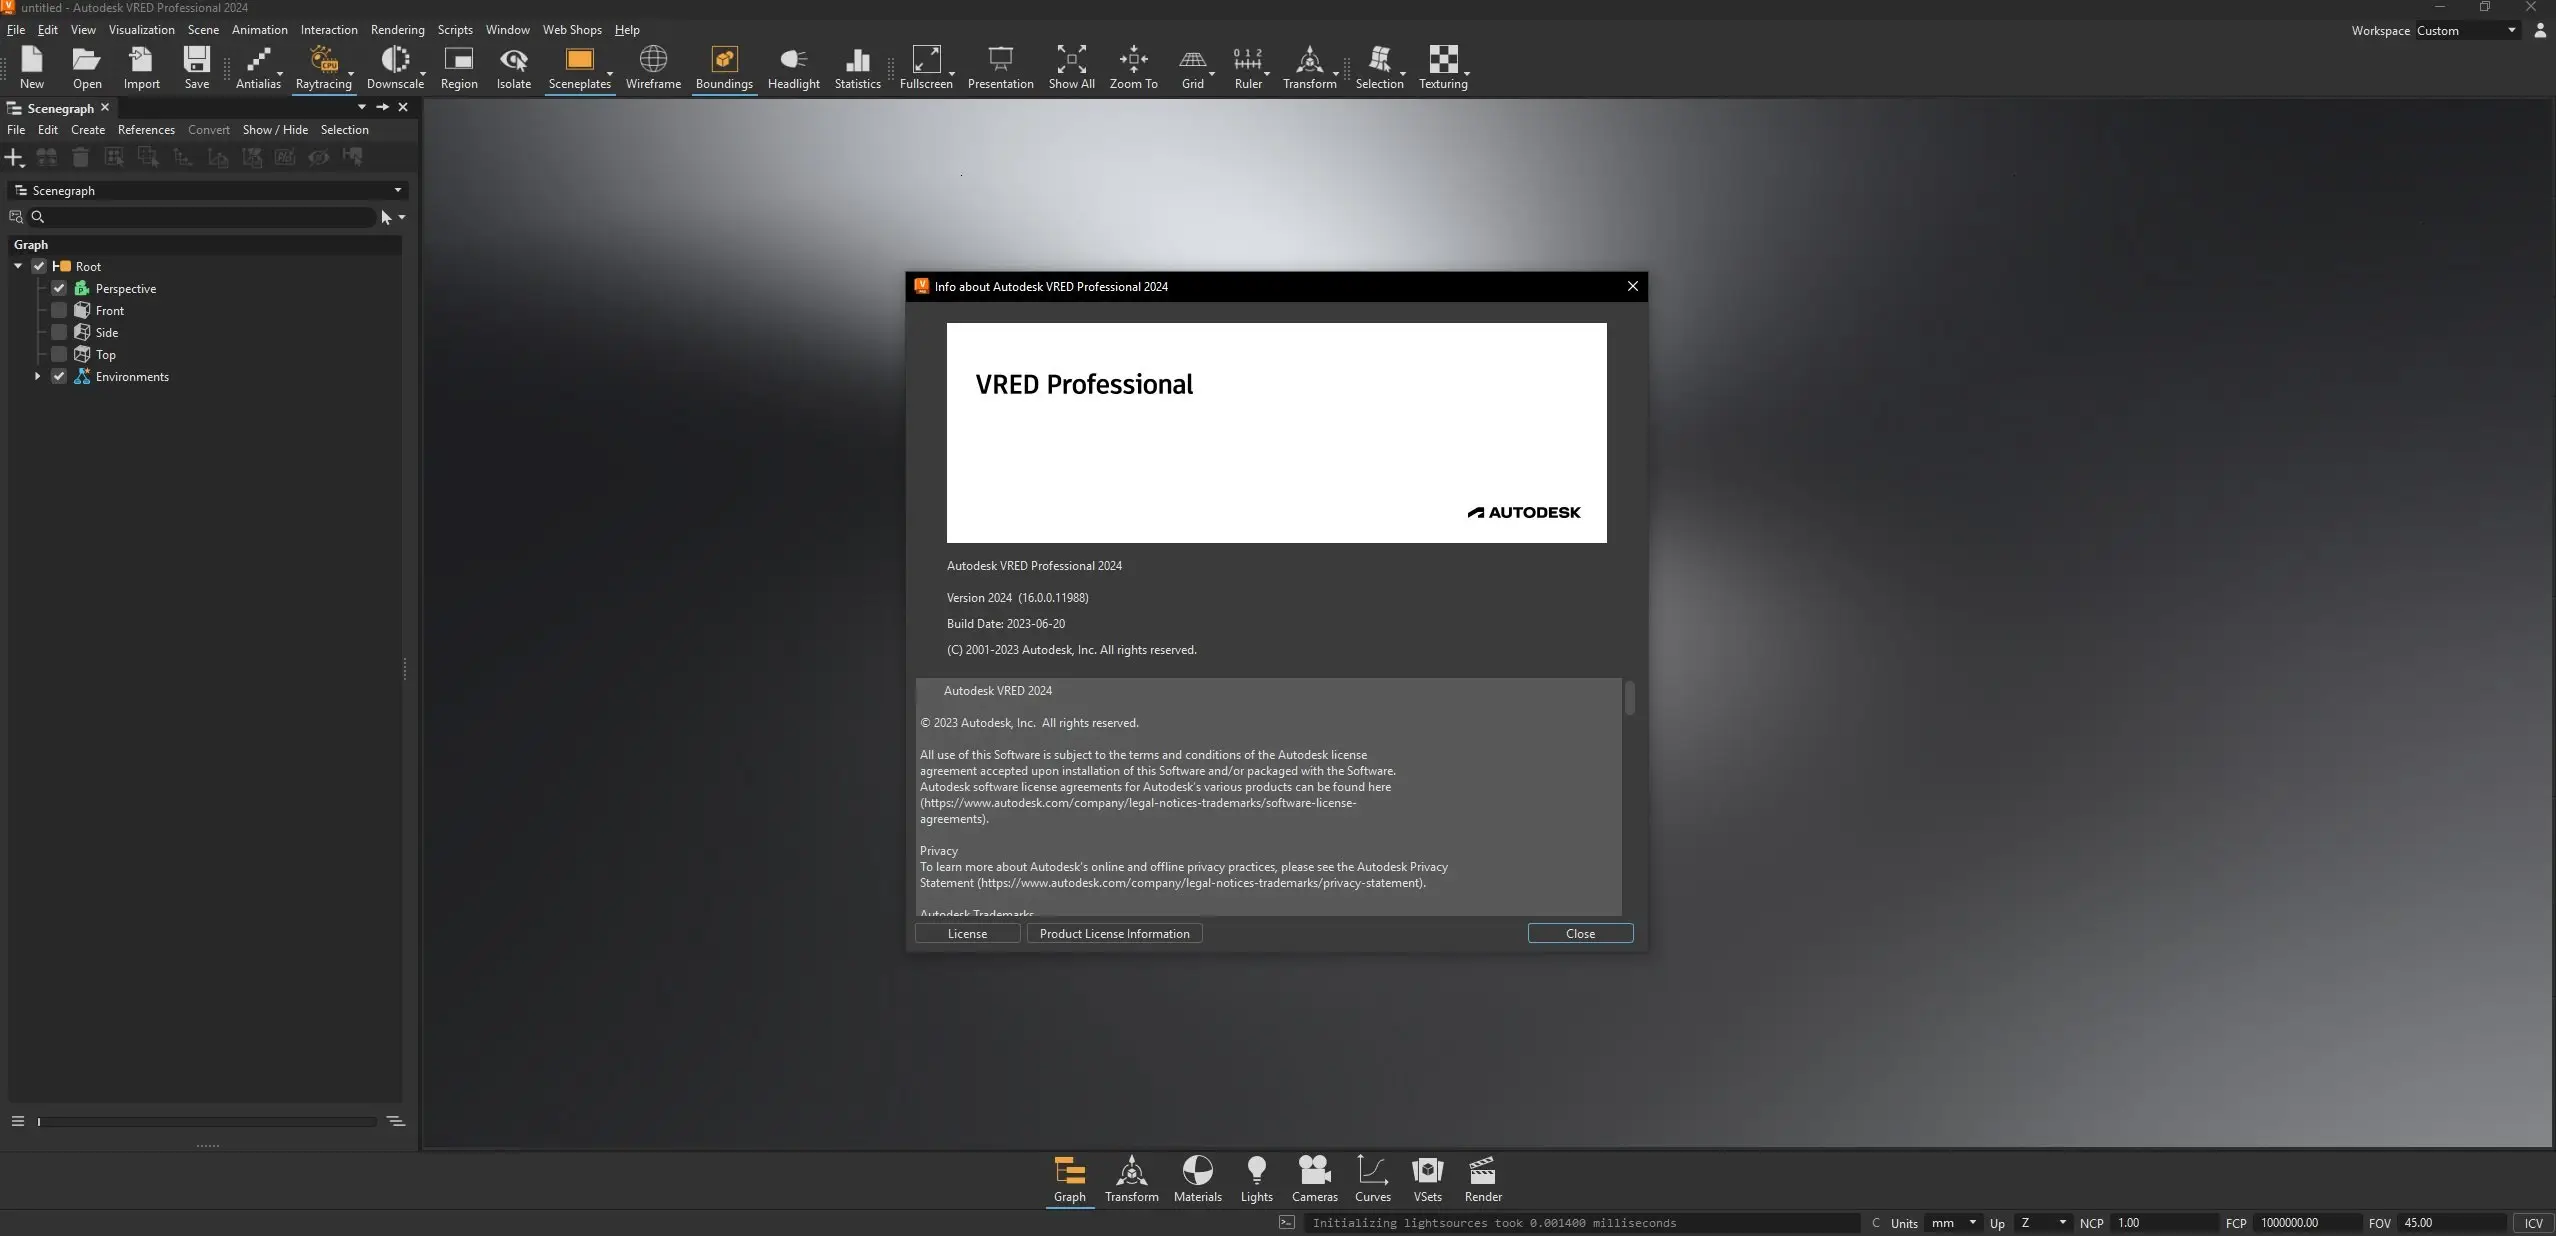
Autodesk VRED (that’s Virtual Reality Editor) covers advanced visualisation, rendering and design review. VRED is a visualisation system, but it’s one that combines the progressive, physically based rendering available in other systems (such as KeyShot or V-Ray) with a set of tools to allow you to bake those visualisation properties (materials, textures, lightings, shadows and so on) into highly efficient datasets that support design review, collaboration, large-scale visualisation and increasingly, virtual reality.
VRED Professional is an innovative and powerful software solutionfor 3D visualization with a superior quality. Fitted with physical camera and material and light settings, based on plastic, metal, coal or fabric physical features, VRED Professional allows users to create visual phototrrealistic fixes. The higher quality that you can achieve straight from VRED Professional, reduces significantly post-production costs. Use the Asset Manager in VRED to manage items like scenes, environments, and materials across multiple projects. Each tab contains the assets and location of those assets for that category. Global assets stored anywhere in the network can be accessed as from a local folder. This supports standardization throughout several projects or even across multiple departments within the company.
VRED 2024 What's New
With VRED 2024 we have reworked and modernized the User Experience and implemented MDL and MaterialX which will give you a ton of more options when working with Materials.
Autodesk helps people imagine, design and create a better world. Everyone—from design professionals, engineers and architects to digital artists, students and hobbyists—uses Autodesk software to unlock their creativity and solve important challenges.
Owner: Autodesk
Product Name: VRED
Version: 2024.0 Professional with Assets
Supported Architectures: x64
Website Home Page : www.autodesk.com
Languages Supported: english
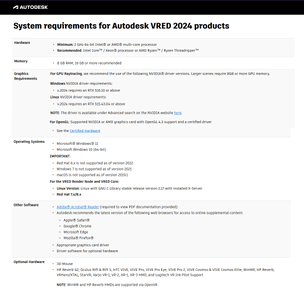
System Requirements: Windows *
Size: 11.3 Gb
Autodesk VRED Pro 2024.0 with Assets

Please visit my blog
Added by 3% of the overall size of the archive of information for the restoration
No mirrors please

![Autodesk VRED Pro 2024.0 with Assets]()
Added by 3% of the overall size of the archive of information for the restoration
No mirrors please
Autodesk VRED Pro 2024.0 with Assets